How To Build Your Photo Studio at Home On Budget in 2023?
Your hunt to Build Photo Studio on a Budget in 2023 ends today. With this in-depth article, we are sharing a step by step guide that you need to build a perfect and efficient home studio.
But before that, there is one thing worth discussing with you. When most photographers anticipate their dream studio, the investment seems just too much. Yet the good news is that with a bit of resourcefulness, setting up your own studio does not have to cost you an arm and a leg.
Moreover post-pandemic, it is wise that you build photo studio at home rather than paying rent and adding further expenses to your list.
In addition to all this, you can start focusing on cutting costs and forcing on DIY’s that can help you save you a huge investment. Despite investing in a backdrop and lighting, if possible just use the old sheets and the parts you can buy from local hardware stores. Like PVC pipes, bulbs, and different lamp holders, which will surely cut your budget by more than half.
There are many of the things you thought can invest in. But you can make it from the things you already have at your home. What can be even better about creating your own equipment is that you can easily customize it. By doing that you will get exactly what it is that you need to build photo studio at home.
Being among the best product image editing services, we are here to share how to build photo studio at home, without compromising the image quality of your products.
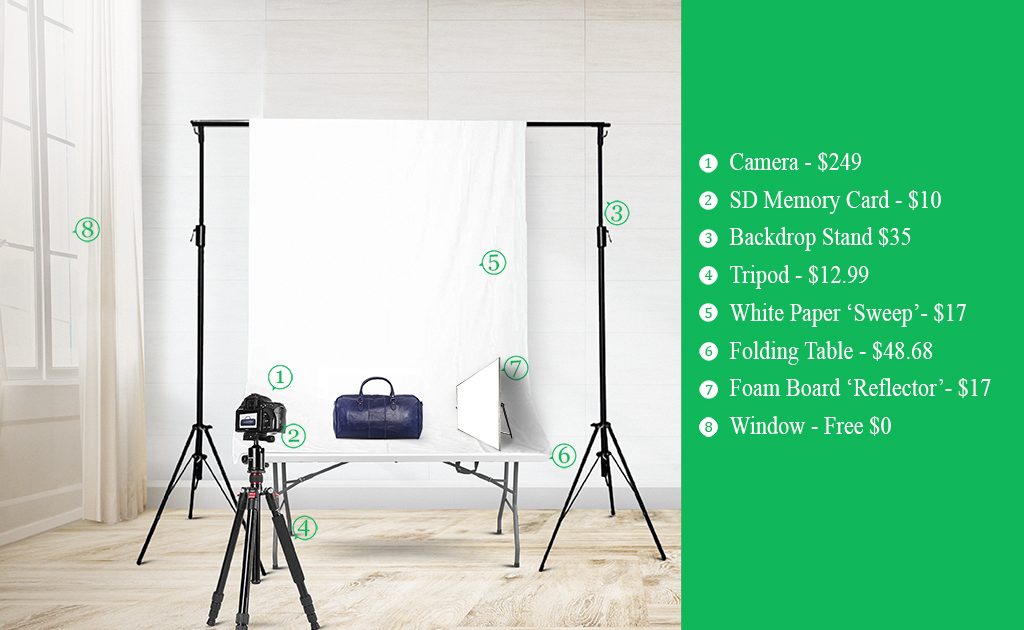
This guide on how to build photo studio at home mentioned the set of home studio essentials below. They cost you below than $400 including the camera.
DIY: How To Build Your Photo Studio at Home On Budget in 2023?
Part 1: Home Photo Studio Shopping List
In the first step of how to build photo studio at home understand this. Various professional lighting equipment in the photo studio can be termed as confusing and expensive. But the best part is that it is possible to get the same quality images without the bulky, high-tech equipment which most professional photo studios use.
High-end equipment and appliances carry their own advantages but are not essential to create unique and beautiful product images.
Thus here is a list of simple equipment and materials which you can get to shoot a range of products.
1. Camera ($249)
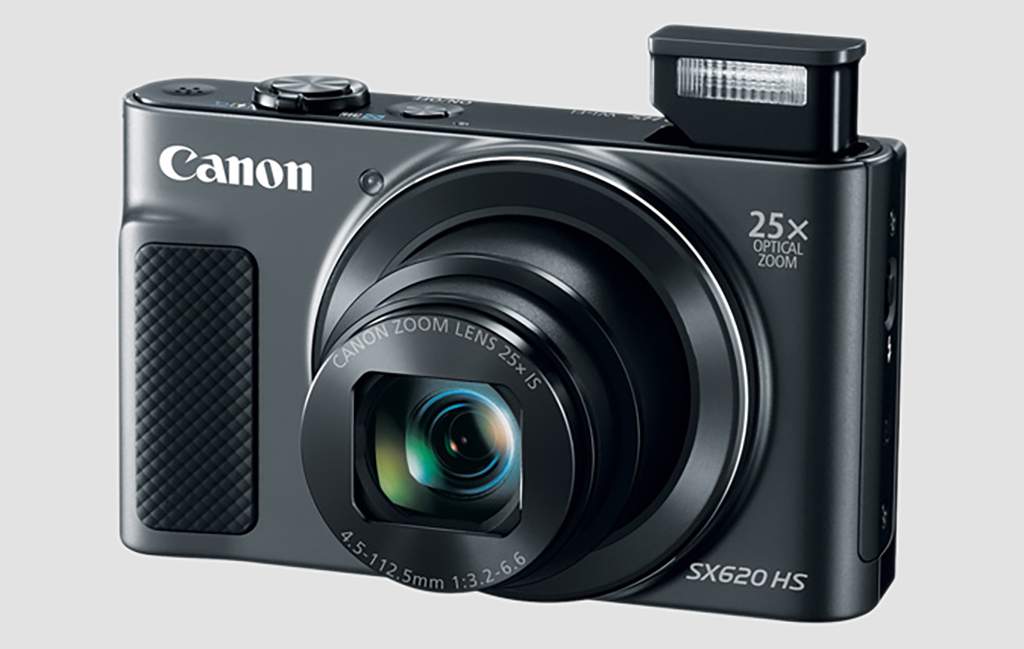
To build photo studio at home, your basic need is a camera. These days almost everyone carries a camera whether on a phone or somewhere else to shoot more on the professional side. For a DIY studio setup, you do not need a bulky or expensive camera.
Your selected camera will contribute to 1 of 5 factors to the final outcome of your product photography. The major role is played by the home studio setup, the specific lighting, and the product photo editing.
Do not bother much about the camera. It is suggested that you must try what you were actually having in your home. You should buy a camera with a minimum of the manual setting for exposure and aperture.
Now the main question is what to buy? As there are tons of variety available in the market for cameras. For your efficient DIY home studio you should go for Canon PowerShot SX620 HS. The retail price is $249 with a manual setting. It captures clear and crisp images at 22 megapixels with inbuilt wifi abilities.
2. SD Memory card ($10)
Always remember to have at least two memory cards with you. It is the only equipment that helps your camera to store the captured images. Storing the memory becomes cheap these days and a modest-capacity SD card should not cost you more than $10.
3. Backdrop stand ($34.99)
A quality backdrop stand can give you several years of great service when you are trying to build photo studio at home. It is necessary to have a backdrop stand to make the white paper in a stable position. It is pasted with the help of duct tape so that the paper will not move and you can capture effective product images. But the backdrop stands at a reasonable price.
4. Tripod ($12.99)
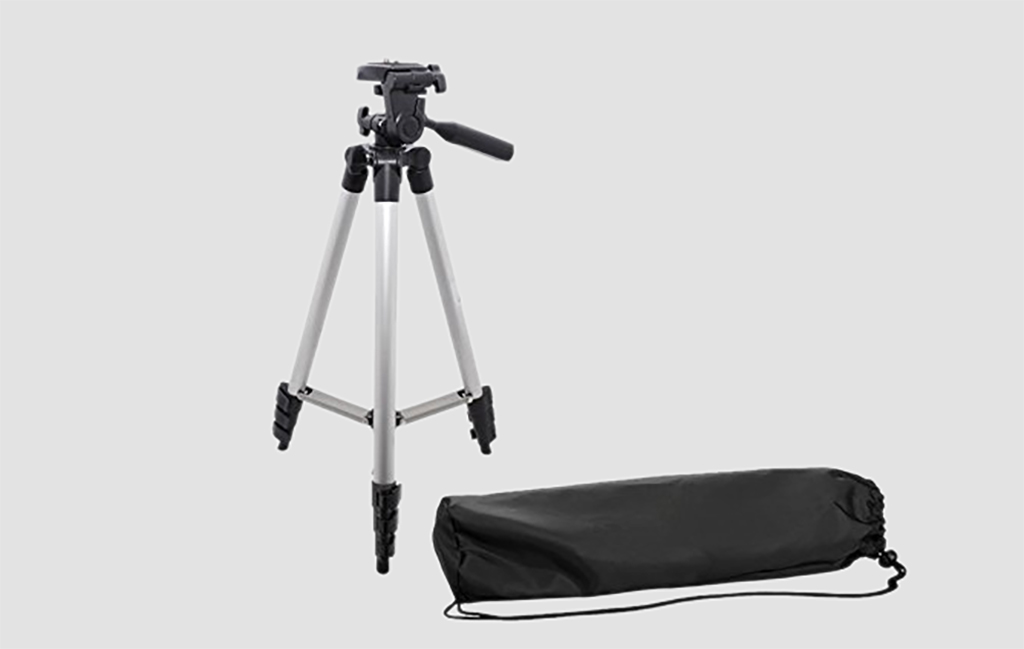
A tripod is an essential part to build photo studio at home. It is to stabilize the camera while working in rooms, where the light is not optimal. Do not spend much on the tripod, but it is so necessary that you should buy one.
Also Read – Best Product Photography Equipment
5. White paper “sweep” ($16.99)
The white paper is essential to be placed behind the product for creating a seamless white photo backdrop. It is easily available at any office supply and camera store. The necessary part is to get a long roll of white paper sweep in order to decrease the amount of post-production work.
6. Folding table ($48.68)
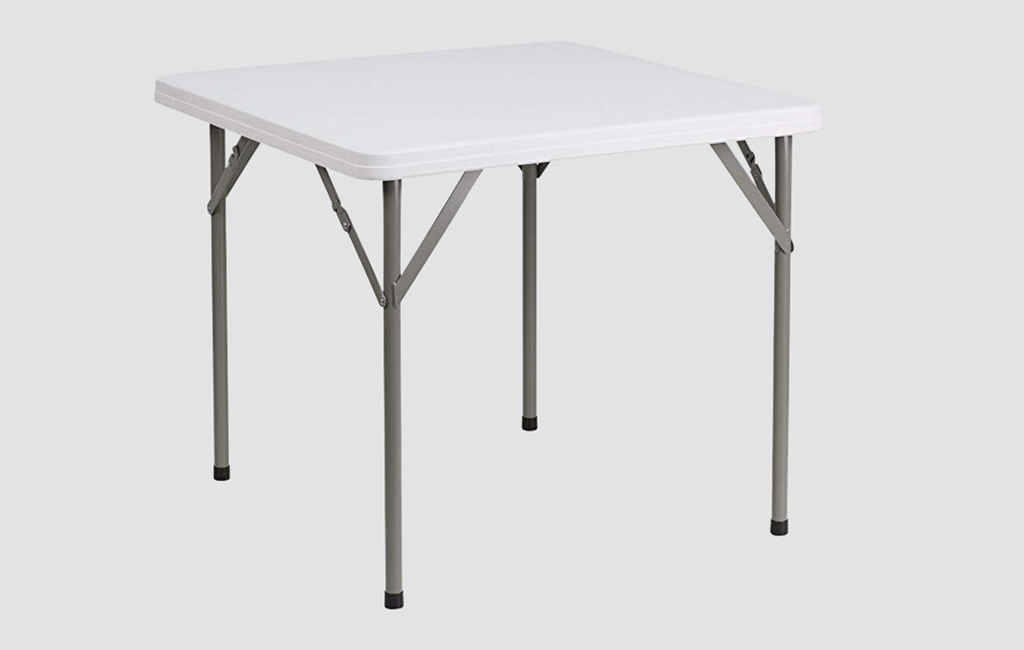
You will also need a photo table to let your white paper “sweep” to fall across. It will allow the freedom to position the product according to the shoot. Your product should not be too high or too low as it will not be comfortable for you to capture the product.
A foldable card table is suggested for easy cleanup. This photo table can be easily used anywhere, making its portability very convenient as well.
7. Foamboard “Reflector” (16.99)
Get a piece of foam board and use it as a reflector. White foam board is used for bouncing of lights from a window of a studio back into your product. The main purpose of using it is to reduce the shadow of the product on the other side of the window.
8. Window ($0)
This is the cheapest purchase to build photo studio at home. Becomes the second last in the list is having large access to the window for allowing the natural light to come in. Just make sure that you should clean your house a little bit and clear some space to work around the window. The key is to have ample natural light and a workplace, which allows you to move comfortably while taking the pictures.
How big your home photography studio should be?
It is not necessary that you need to have a 100 square meter space to build a photo studio team when you are just getting started. To build photo studio at home you can convert a vacant room in your house or any of the renovated tool shed in your garden to build photo studio at home and that’s it. You are done with the selection of space.
The smallest to smallest photo studio will also help you out in your work. It is obvious that working in a smaller space will be quite a tough challenge but not an impossible task. It all demands a good deal of flexibility with the ability to make compromises, and a lot of creativity. What are the basic requirements of a home photography studio setup?
Here is a full and handy list:
1. Lights
A single light and a reflector are considered more than enough to build photo studio at home. But it is recommended that 3 lights will offer you great flexibility.
With these lights, you can get cheap manual speed lights also. Moreover, you can try the Yongnuo 560 IV, or studio strobes like Bowens Gemini.
2. Lighting modifiers
An umbrella and a reflector are a must if you are looking forward to build photo studio at home. The Neewer and Godox are cheap umbrellas, softboxes, and octal boxes. It will fall under your budget as well. The tools are considered quite good and can be easily folded into handy, small, and easy-to-store packages.
3. Light stands
For each light, you need an extra stand. As it is a rule of thumb, the heavier your light is, the sturdier your light stand needs to be. Don’t waste the money on cheap gear or you may risk your light being unstable.
Always prefer stands which extends up to 2.4 meters and higher, as many of the times, the lights are above the model.
4. Background
A collapsed background is a great way to start, that is if you are not able to install a permanent background. Impact and different other brands are not so expensive. Most importantly, when compared to Lastolite collapsible backdrops.
Also Read – Perfect Background for Product Photography
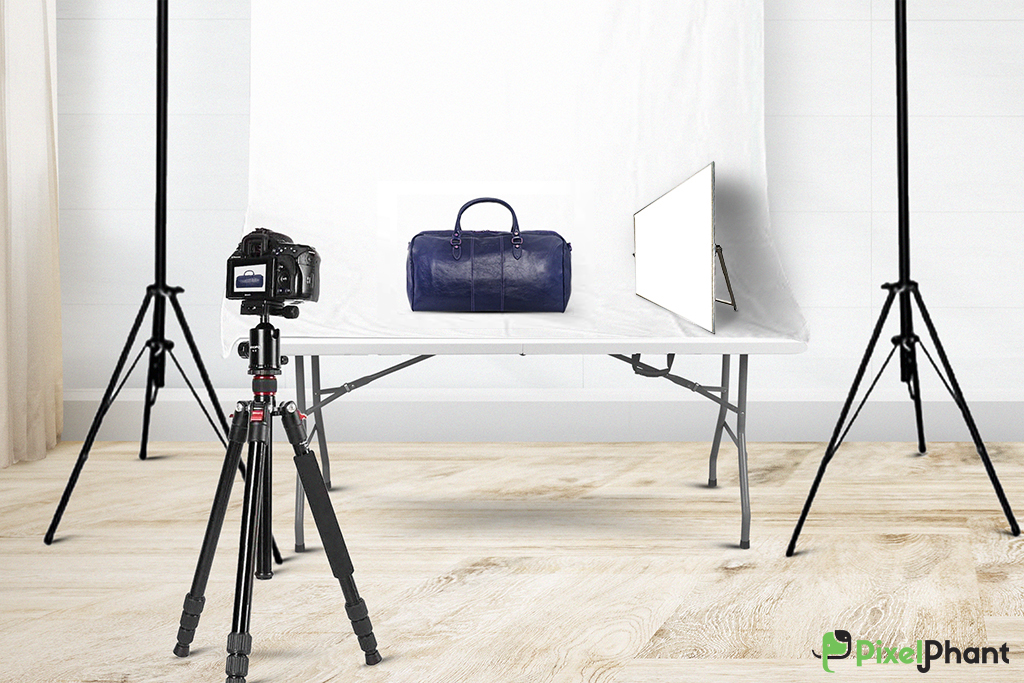
Part 2: How to Set-up Your Photo Studio at Home?
Step 1. Carve out the space for the studio
It is the first thing that you need to decide as what will be the place where you are going to build photo studio at home
The most essential part is the subject you are going to shoot: Are you planning to shoot the full-body portrait or only the furniture? Or do you just want to take headshots or photos of products?
You can set up your DIY product photography studio in any of the unused rooms or any of the space in your house. Or in case you need some small space then you can free up any corner of your living room also.
Yet another detail you may also want to add is that where your models if any of them you are using can wait and change. Model’s comfort should always be your priority. You should allow adequate space for them to change clothes, it does not matter how small or simple it may be just thought of a folding screen and a chair can do just the trick.
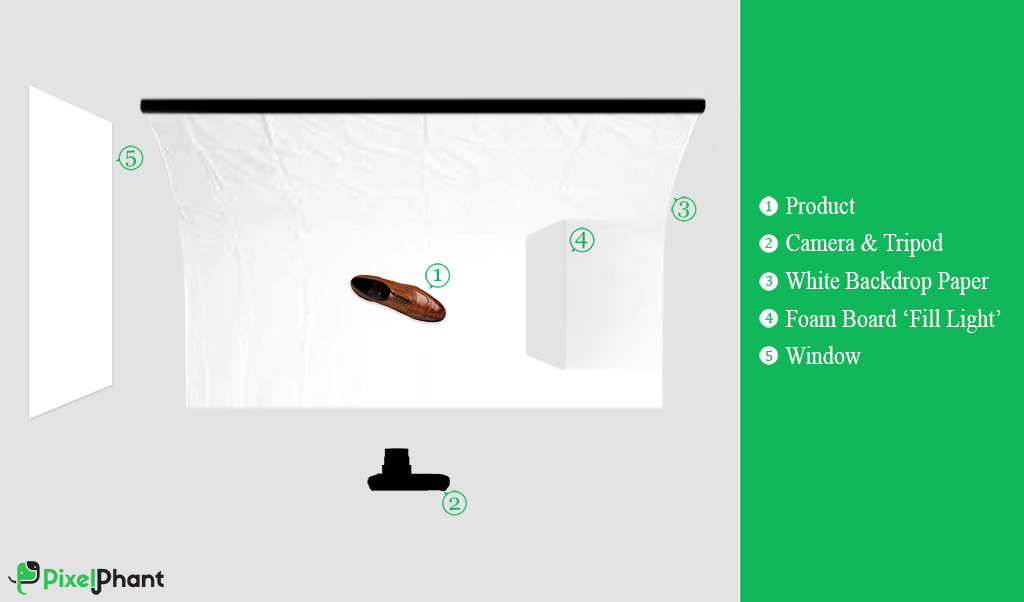
Step 2. Table & window
Initiate the process of shooting by positioning a foldable table near your window. The major goal should be the dispersion of even light on the full product. You do not want the direct sunlight to hit the set.
With this, you should also ensure to allow yourself enough space room to move around the table for styling and shooting your product once the backdrop is set up.
Step 3. Smooth white backdrop paper & Tape
Now it’s the time to reveal your white background paper roll and stick it to a wall, ceiling, or anything that can hold it up such as a large box or a book stand. Wrap the sides of the paper to the table also. By doing so your particular setup will not move while you are shooting the pictures.
Maintaining the white photo backdrop also supports keeping things clean and organized which offers you to focus on your camera.
Step 4. Product
Before you shoot the product, just make sure to clean and prepare the product. This is basically common sense but most of the photographers mainly forget to do that. Just remember a simple and a little cleaning can save your time in the post-production process.
If in case you are shooting jewelry, just ensure to clean and shine all your chains and gems.
And at the time of photographing the shoe, brushing is one of the ways to clean it and to remove any dust or scuff marks. These practices can easily decrease your post-production time so greatly. You need not have to worry if your product is not 100% accomplished because it is possible to fix the defects in Photoshop.
Now it is time to position your product in the middle of the white backdrop and straight the same in the lane where your camera will be placed.
When you make a spin of your product, you should make sure to place your particular tripod, camera, and object in the actual same place for every shot. By doing this, the product is enclosed the same way for all images.
Step 5. White foam board “Fill Light”
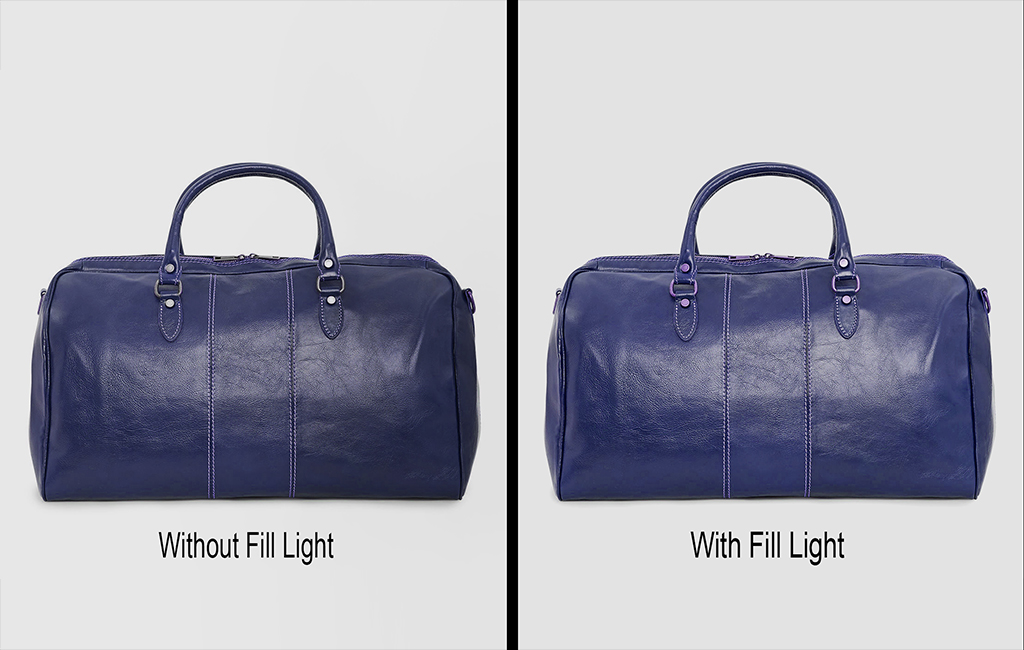
Based on the natural light or window light that enters your room with the specific color of your product. You might need to add extra “fill light” to achieve your DIY process. With photography lighting, you can get a perfect match of lighting on every side of the product.
To build photo studio at home The main thing is that your specific foam board should stand straight and is positioned contradict to the window, and is the same size as your subject or larger.
Step 6. Camera & Tripod
Broaden up the legs of your selected tripod and adjust to it until the head of the tripod is flushed out with the surface of the table. Your tripod should be levelled up because it is easier to adjust your camera when it is attached. Just attach the camera to the efficient screws or clip on your tripod.
Once you are done with securing the product photos with the camera, start the game of positioning the tripod with the viewfinder on your camera while guided at your product. In doing that you will demand to get your product in the frame of your camera, but ensure to leave extra space around the subject so you have room in the image.
To Wrap Up
It was a detailed guide on how to build photo studio at home. A short trip to an office supply and camera store, and a $400 investment with the 10 minutes worth to build photo studio at home. Then you will get all set to initiate the shooting of great-looking product images!
That was not at all bad as you thought it would be, right? You can easily get to know what are image optimization pleasures and how you can do it. We highly recommended reading this blog Make a Career in Photography.
If in case you want to use an online photo retouching service, contact us and get it done within 24 hours.