360 Product Photography: An All You Need To Know Guide
Product photos are the most essential element for every online business as they are the real factor in decision-making for buyers.
A study shows that 360 photography satisfies the buyers 50% more than regular photos.
Also, 32% of the buyers spend more time on the website because of the availability of 360 product photography.

In this article, you will be learning how to perform 360 photography with the minimum setup so that you can take 360° professional photos every time without breaking the bank.
What things do you need to Capture 360° Product Photos?
A DSLR Camera

A basic, good-quality DSLR is your key to capturing world-class photos all the time. If you are wondering what are the best digital camera brands to choose from to perform 360 product photography, then I highly recommend you to visit the link.
A Turning Table
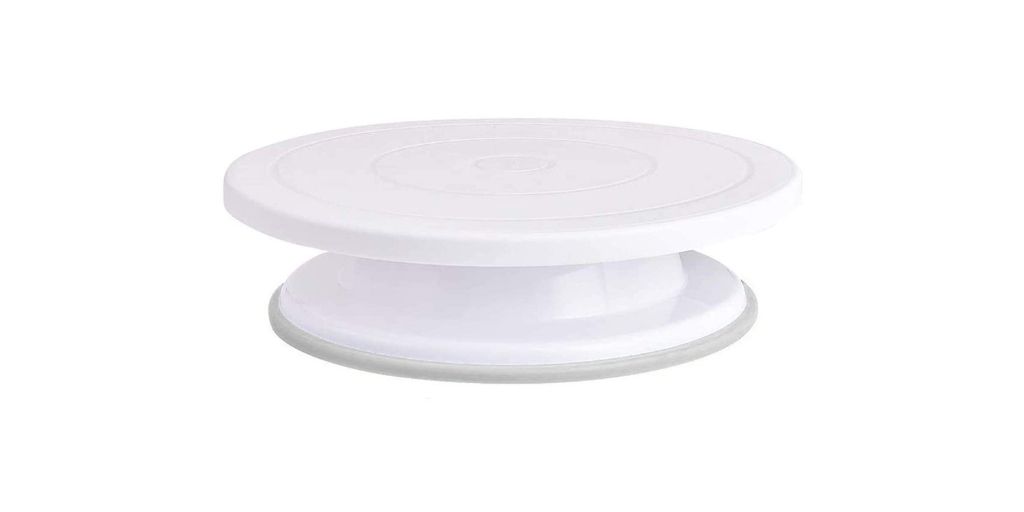
A turning table is a basic requirement to do the perfect 360 photography. To start with a setup that is minimal and budget-friendly, ComXim Professional 360 Photography Turntable can be your best companion in achieving the best results in 360 product photography. This 360 photography table is under $100 and works brilliantly.
A Tripod

Tripod is necessary to achieve sturdiness. In 360 product photography, you are required to have a very stable setup to maintain consistency in capturing the complete view.
An unstable setup will ruin the 360 photography look and you’ll end up with a blurry, distorted image. Vanguard Alta Pro 263AP Aluminum Tripod won’t even cost you a complete $200. It is amazing for the DSLR camera you choose and reliable with +4 ratings on Amazon.
A Flashlight

The flashlight that you have with your camera is very useful in 360 product photography. But along with that, you are also required to have a flashlight that can fall from the top where your object is placed. That is, at the top of your 360 photography turning table.
However, using this flash is completely optional if you are already working in a well-lit room and your camera flash is enough for space.
Now that you’ve gathered all the important tools, let’s start mastering 360 product photography.
Tips to Remember While Performing 360 Product Photography

There are a few tips that you can make use of before performing 360 product photography. These are as follows:
- Have a reliable and static setup to avoid any distortions and mistakes. The experience needs to be smooth and steady throughout.
- It is important that you place your object at the center. Hence, it is necessary to nail the center otherwise your object will wobble around the table and won’t rotate as your table rotates without moving.
- Follow the grid lines on your camera. These grids work as your guidelines to determine whether your object is following the same center in each frame during 360 photography or not.
- Create a light diffusion if required to create soft light. You can make use of the reflectors to adjust the lighting.
- Keep your product clean, dust-free, and if possible – use a product cleaning spray over your product. In 360 product photography, the product needs to be clear and smudge-free from all angles.
- If you have an electric 360 photography turntable, then you’d be able to download its app on your smartphone or computer that will allow you to set its controls. Make sure that your controls are synched with your turntable and work in real-time without a buffer or gap. A slight lapse in time can make you start all over.
- Run a test shoot before you start your actual shoot to eliminate the waste of time. During the test shoot, simply check the stability of the product, the speed of your turntable, the synchronization of your table with the camera, and the controls of the turntable on your smartphone. It is required because even synchronization of just a millimetre could disrupt the whole process.
- Do not forget to edit your photos as it is the most important part of your 360 product photography. However, editing each photo could be a very tedious task, for which I recommend that you hire 360 product photo editing service professionals to make things easier. Such professionals are more cost-effective and time-saving as compared to investing yourself in editing 360 Photography.
If you are thinking why? – Read this article that explains why it is time for you to outsource product photo editing.
Steps to Perform 360 Product Photography
Step 1
Have your camera set at the required position on your tripod from which you can get the best angle.

Step 2
Change your camera settings to ‘Grid’. This will help you to define the product position with each frame so that you can achieve consistency throughout the shoot. You might be shooting 24 to 360 images of the product and I know that finding the unevenness in any one single image could be a disaster.
Step 3
Place your product at the center of your 360 Photography turning table. Make sure that it is steady enough so that it doesn’t move as you start moving your turntable.
Step 4
Turn on your flashlight at the top of your product and adjust the distance accordingly. Choose the angles that work best for you as it depends on the size of your product.
Step 5
Check if your turntable settings on your mobile are working just fine. Adjust the speed of the turntable against the number of clicks at which you’ve set your camera.
You can auto-click your images through your camera or can click them manually depending on what’s more convenient to you. You can keep your rotations up to 200-220 in the app that’s synching your camera and the turntable which makes it better to capture images from all angles beautifully and equally, especially when you are using automation.
Step 6

Once you have your complete 360 Photography setup ready, just get started with your 360 product photography.
As explained in the tips above, you can run a test shoot first.
Step 7
After you have your clicks completed, gather them into the editing software, and arrange the sequence if required. Again, it is easier to get a professional to arrange and edit your photos. However, if you choose to do it yourself, you can use Photoshop directly or Image Processor in Adobe Bridge (Tools > Photoshop > Image Processor).
Then after you’ve made the action in Photoshop, in Bridge, you can select what file format you want to save as, which resolution and which actions to run, and when you start, it will process them all through Photoshop, and you can choose thousands of 360 Photography images if you want.
Step 8
The final step is to put your 360 product photography into action. Make sure that your product photos are in the correct sequence and the images are edited evenly in all the photos.
Arqspin is a great choice that you can use to run your 360 photography as required to be. You can choose to make a video or keep it free for your viewers to rotate it manually.
Conclusion
360 product photography is becoming the most popular trend and is gaining demand from both the customers as well as the sellers’ side. It makes it easier for consumers to take a complete and realistic look at the product before making a purchase.
This article about 360 product photography revolves around the merits of the concerning style and how to perform it with a minimal set that is pocket-friendly.
360 product photography improves engagement as well as customer satisfaction. If you are a professional photographer or an eCommerce business owner, the tips and the steps explained above could be beneficial for both industries.
If you wish to learn more about eCommerce, Product Photography, Product Photo Retouching, and how to grow online, subscribe to the PixelPhant email newsletter below.