Remove Blemishes in Photoshop: 4 Easy Steps To Perfect Editing
Ever seen the beauty goddesses featured on the magazine covers or on the products promoting it? Our first glace is star-struck by their silky-smooth, blemishes-free, flawless skin and we start wishing for some magic that the universe could conspire in our favor too to get that boon.
Well, when I started photo editing, I realized that the skin in those photos is no boon given to anyone but surely the magic of photo editing software such as Photoshop.
Skin Retouching or the process to remove blemishes is one thing that is often cleared from the skin of the models who are featured. You can live this dream too in your photos and make them look more professional and presentable.
I have elaborated on quick yet detailed steps on how to remove blemishes in Photoshop further in this article.
Steps to Remove Blemishes and Skin Smoothening in Photoshop
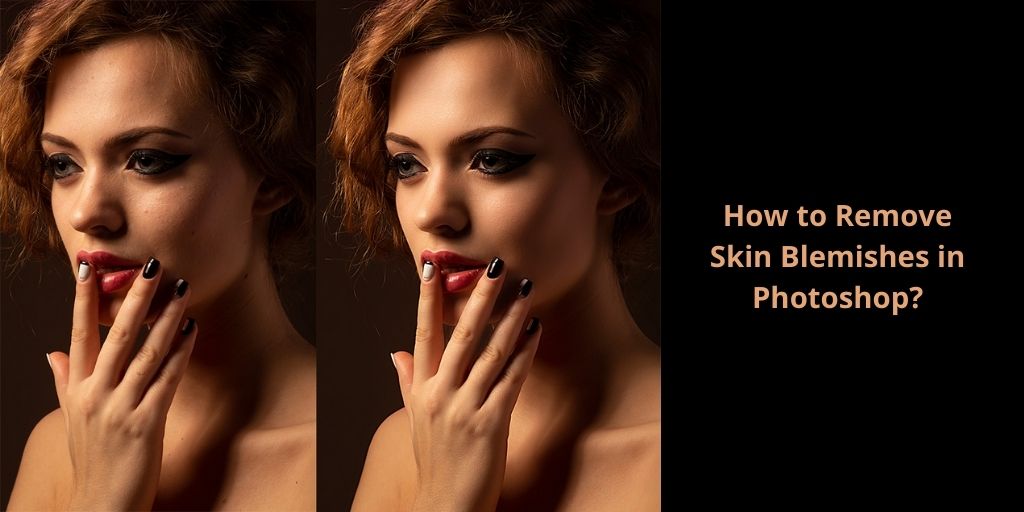
Remove Blemishes in Photoshop
Step 1
Open Photoshop → File → Open → Open the photo from which you want to remove blemishes → Create a new layer from the properties panel.
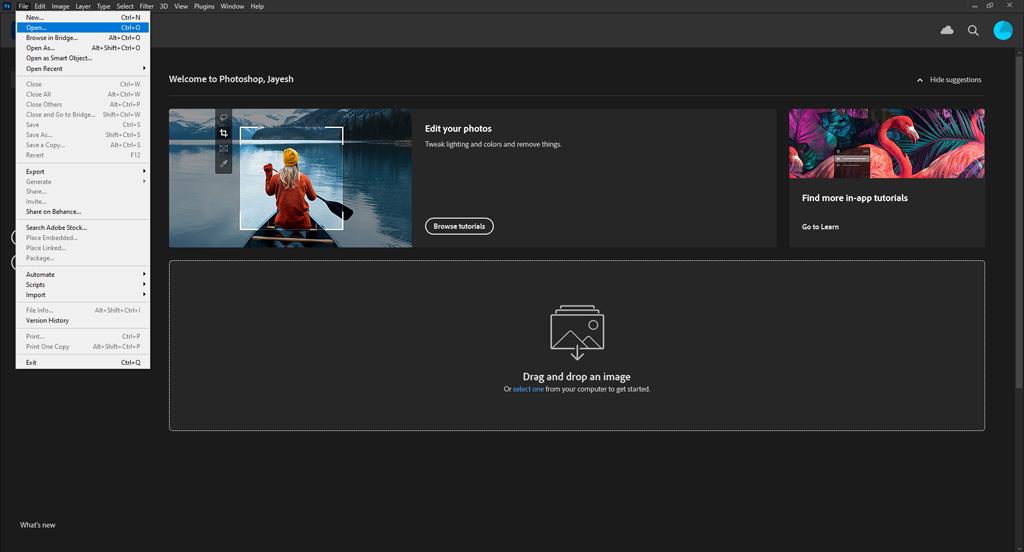
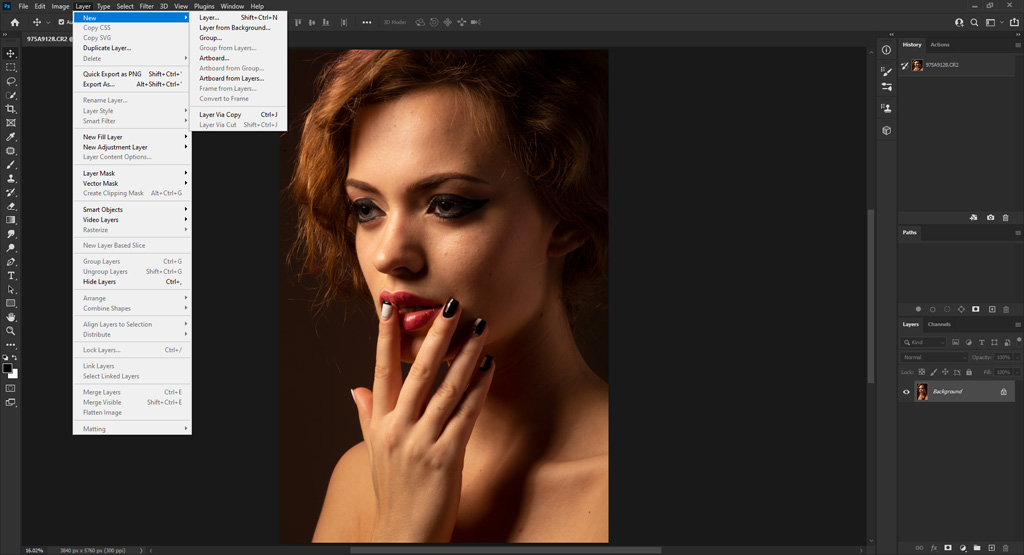
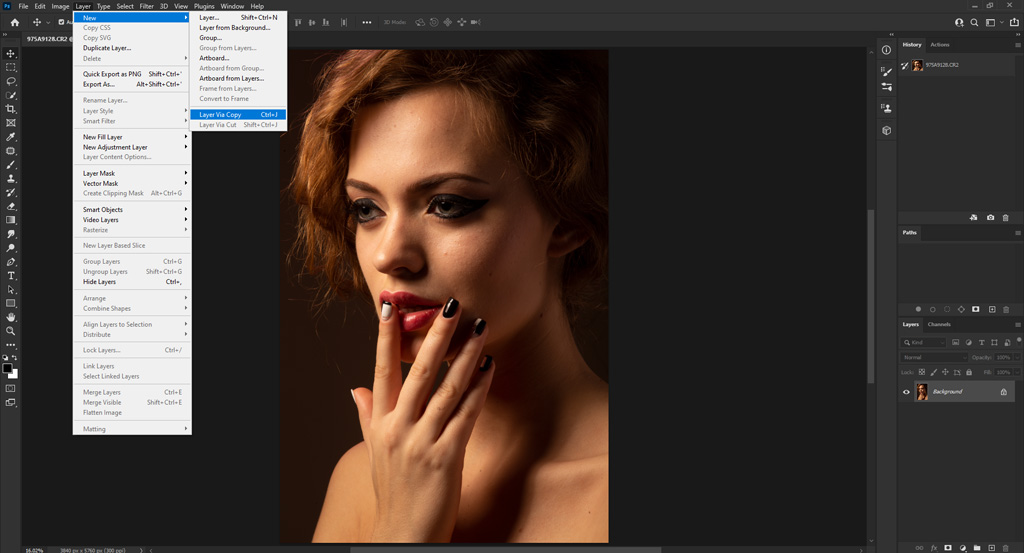
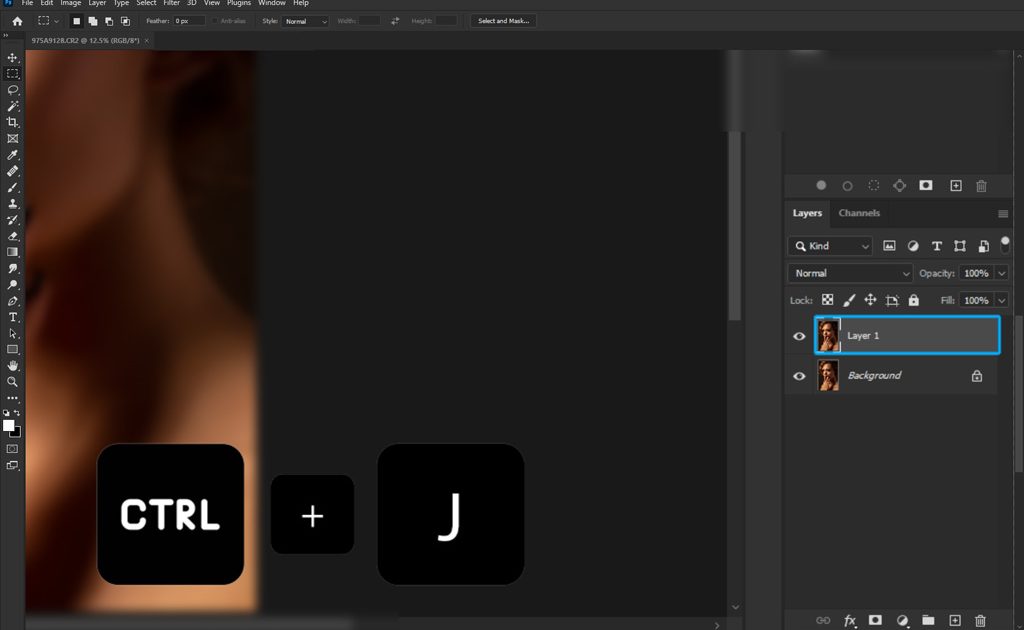
You may use the shortcut to create a duplicate layer – Ctrl+J (Win.) or Command+J (Mac).
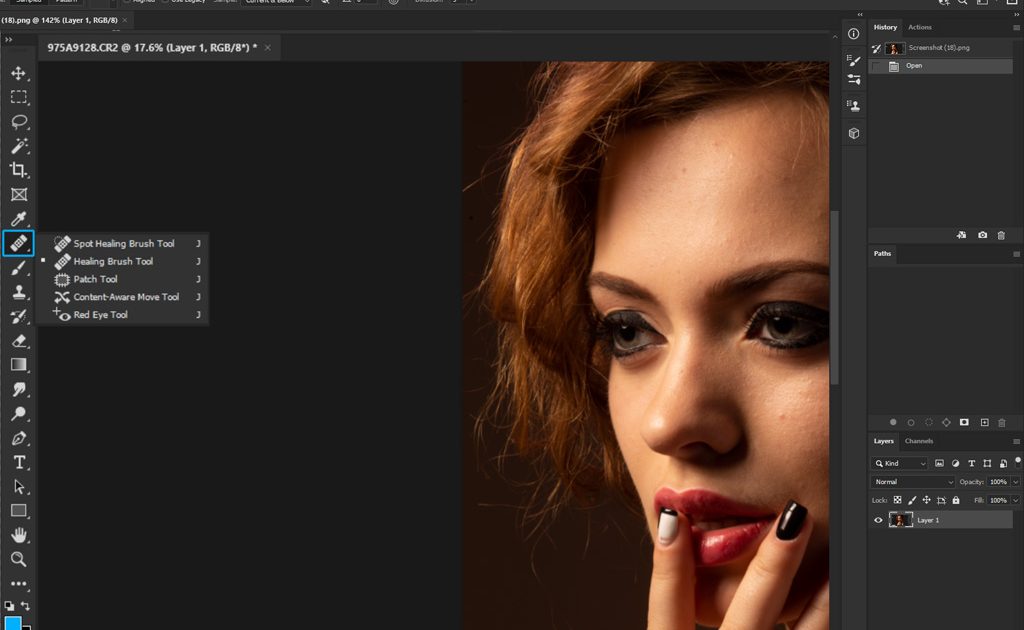
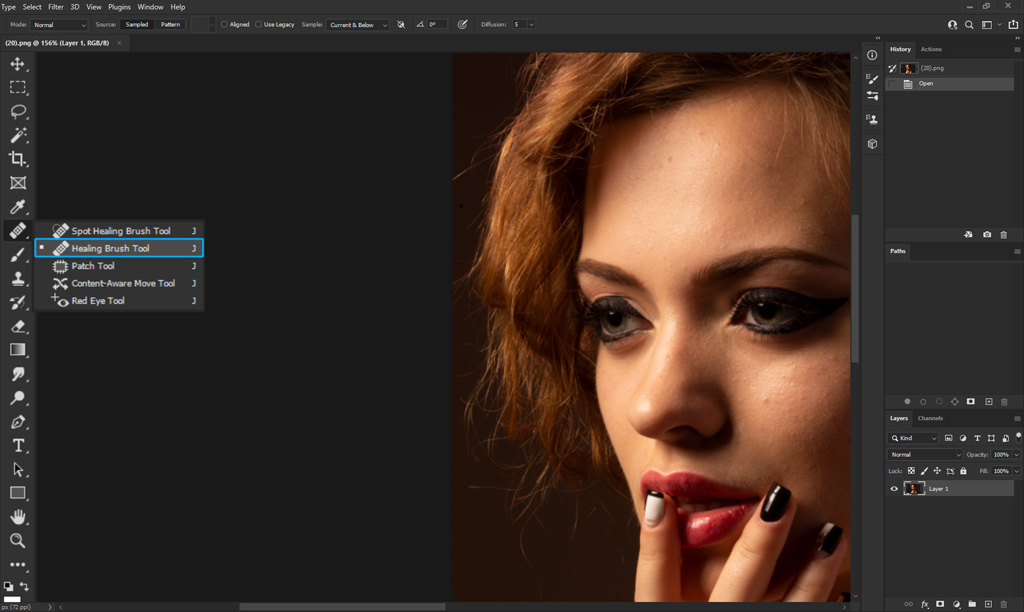
Step 2
Select the regular ‘Healing Brush tool’ → Keep the sample type ‘Current and Below’ in the sub-title bar of the healing brush tool.

Step 3
Press ‘Alt’ and click over the area of the skin from which you wish to take the sample → brush it over the blemishes to replace it with fine skin.
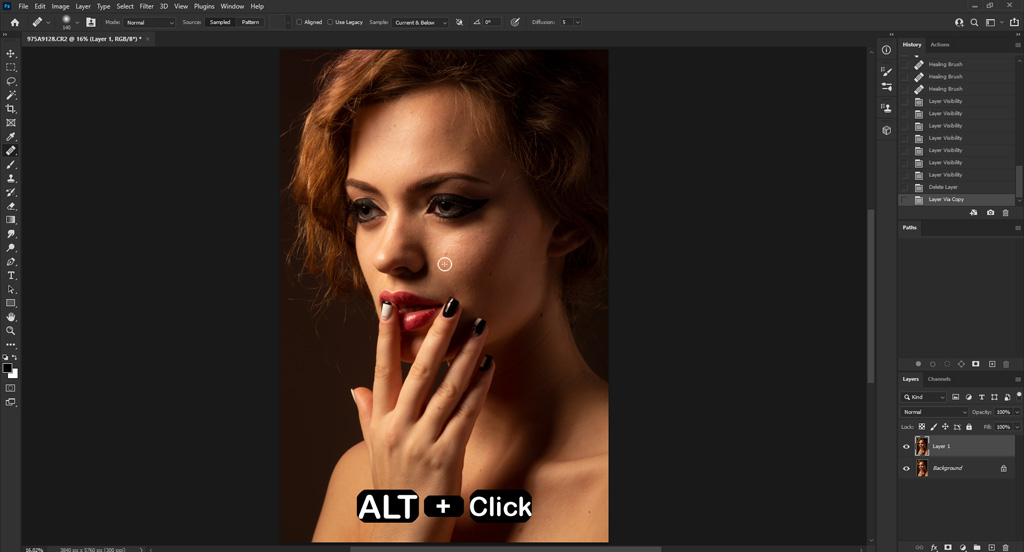
Keep doing the process until you are satisfied. You can remove the unwanted hair falling over the face too. You will see all the blemishes are removed.
Skin Smoothening
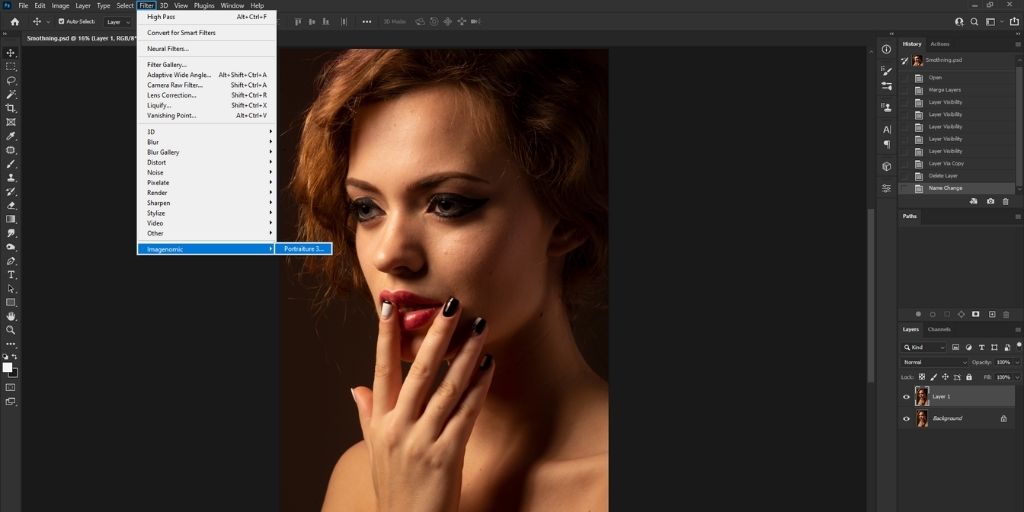
Step 4
Here, you’ll be required to install an easy plugin of Photoshop called Portraiture. Though you may want to use ‘Filters’ → Blur → Surface Blur, that might not give you the results you desire. To get the best and the most natural results follow:
Go to your background layer → Go to ‘Filters’ → Image Nomic→ Portraiture – 3. Take the reference from the images for better understanding.
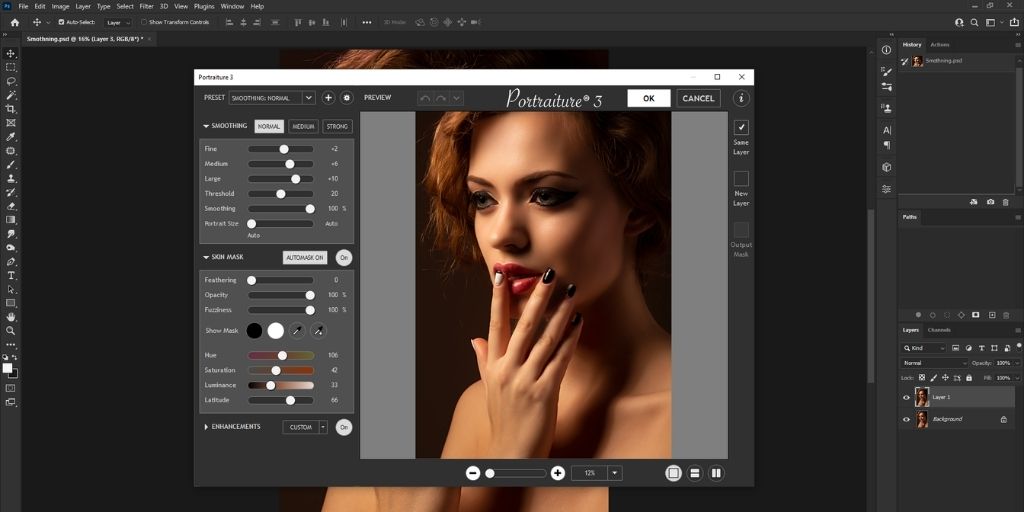
You will see that the skin in your photo is completely smoothened and has become flawless.
What is the importance of Skin Retouching or Removal of Blemishes?
There is no industry left that doesn’t interact with photos. One way or the other, you need to involve photos in your brand. The moment you have a service or product ready, you find a way to trace it down in form of visuals to attract your customers.
The models who are trying to create a career in modeling consider retouched photos of themselves by removing blemishes to create a strong portfolio.
The technique to remove blemishes in Photoshop is not just thoughtful for the photographers and models who want to create an attractive portfolio. But, it is equally important for the businesses who want their models representing their products to look terrific too.
Professional photographers and big brands never send out raw images of people that represent their brand. Photoshop has become the inseparable segment when it comes to enhancing the quality of a photo by removing unwanted parts of it.
Businesses prefer to hire photo editing professionals to remove blemishes in Photoshop as they know what needs to be covered and how to do it correctly. PixelPhant specializes in photo editing services such as photo retouching, color correction, etc. to augment the quality of any photo clicked by anyone with any camera.
What I’ve learned in my career of photo editing is that for businesses – What people see on the website and in magazines drives their wish to make a purchase. If your photos fail in captivating your customers, there is no point in spending so much on photography and investing time in posting them just as they are.
Mainly it becomes necessary to remove blemishes because:
Corrects Imperfections
While clicking a photo, there could be many factors that can not be controlled apart from blemishes. Falling of unwanted hair over the face is one such example that can be corrected during the process in which you remove blemishes.
Gives it a professional touch
When you simply send out a raw photo of your model representing your product, it reflects that you are not serious enough for your business.
A little effort to get the final result shows how professional you are in your work. When you remove blemishes and retouch the image, it looks more polished and appealing.
Attracts people
It’s all about show-off. The more your photo looks attractive, the more people would like to see it. Seeing is the first step in further exploration when it comes to businesses.
You use models to represent your product so that the overall image can catch the eye of the customer. After you remove the blemishes and smoothen the skin, your photo simply becomes more attractive.
Conclusion
Skin retouching can make your photo look more attractive in appeal to woo your clients and customers. I believe that the technique is required to be used whenever the aim is to target a mass of people and impress them.
Learning some basic steps to remove blemishes in Photoshop can improve the overall quality and make you stand out from the rest.
The steps shown in the above article are the ones that I have simplified for the most accurate results without any hassle. I hope that these will help you master the technique in just a single try.