5 Easy Steps To Remove Background In Photoshop
To remove background in the images has become a trend and Photoshop offers you various major tools namely, magic wand and selection tool that can do the job for you. When you remove background in Photoshop, it puts the focus on the product, provides clarity, and removes distraction.
Suppose you have never worked with Photoshop before. In that case, we promise that by the end of this article, you will be able to remove background in Photoshop, learn product image editing, and will be stuck to your computers – experimenting for hours!
Along with learning to remove background in Photoshop, you can magically merge multiple images & make them appear as one, play with colors, and manipulate lighting.
Steps To Remove Background In Photoshop
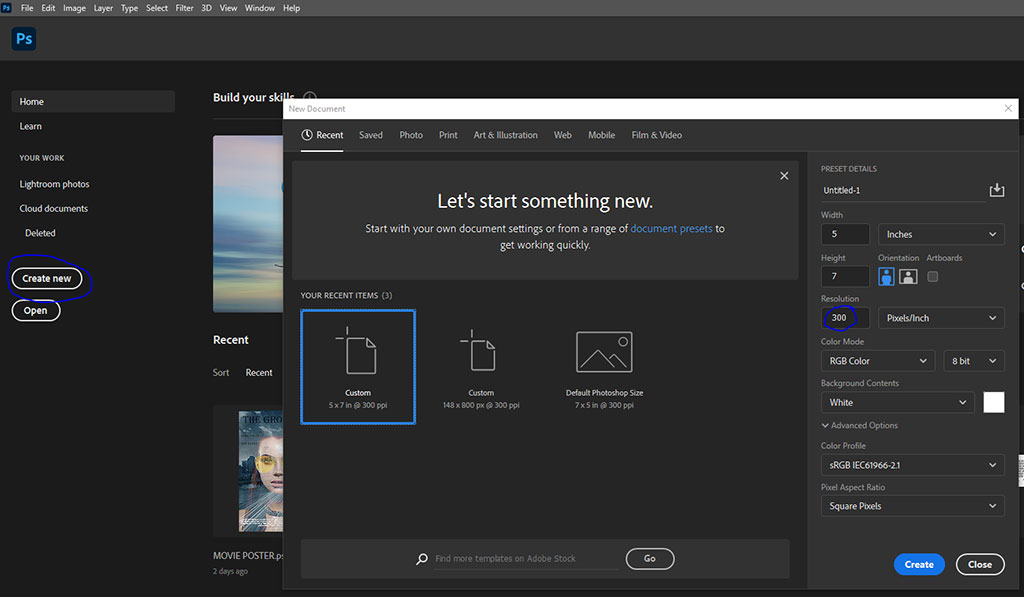
Step 1
Open Photoshop → Create new → (300 PPI for printable and 72ppi for digital document)
Step 2
Click File → Open → open the folder where you have saved the image from which you want to remove your background.
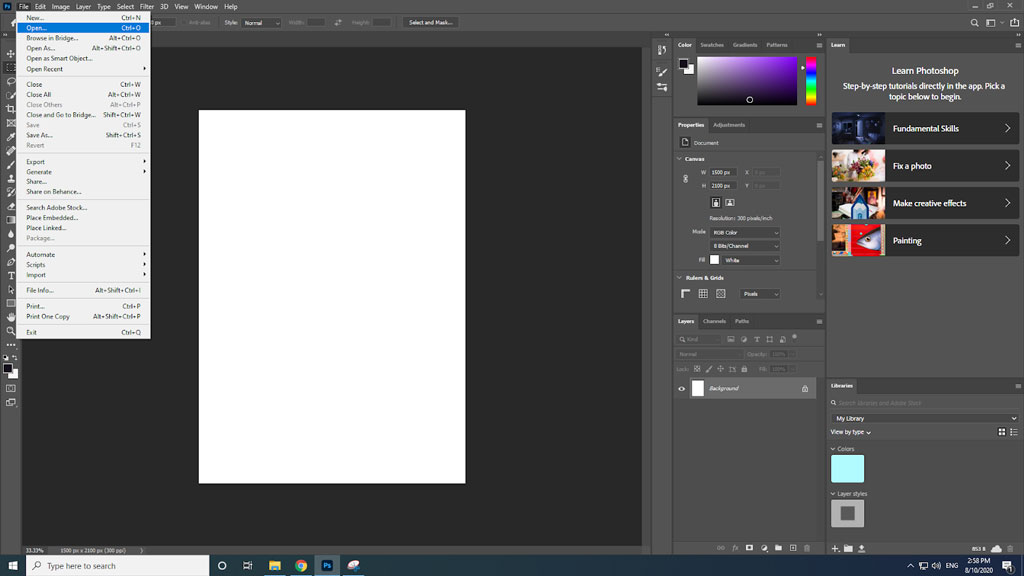
If you want you can rename your layer from the layers panel which will be displayed on the right-hand side of your screen. If it doesn’t, then you may click on Windows (From Title Bar) → Checkmark ‘Layers’. Shortcut – F7 for windows.
Step 3
Add a layer mask to this image as it will not mess with your original image and the changes will only be done to the mask added.
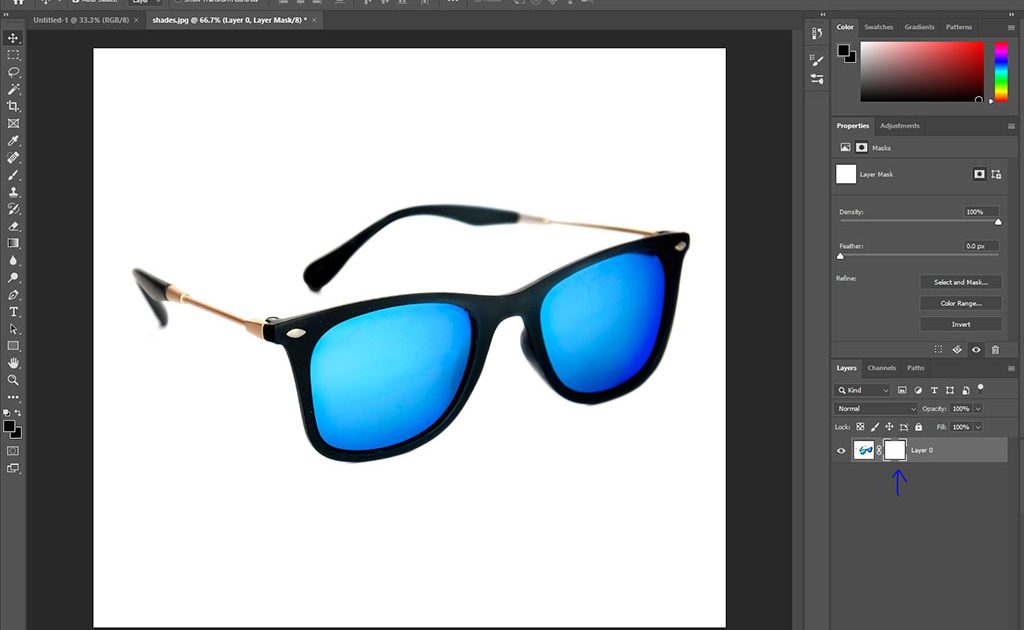
To add, go to the bottom of the Layers panel → and click on the rectangular icon with a circle in between. The layer mask will be added to your selected layer.
Step 4
Go to the toolbar in Photoshop and select the 4th icon from the top, i.e. Magic Wand Tool.
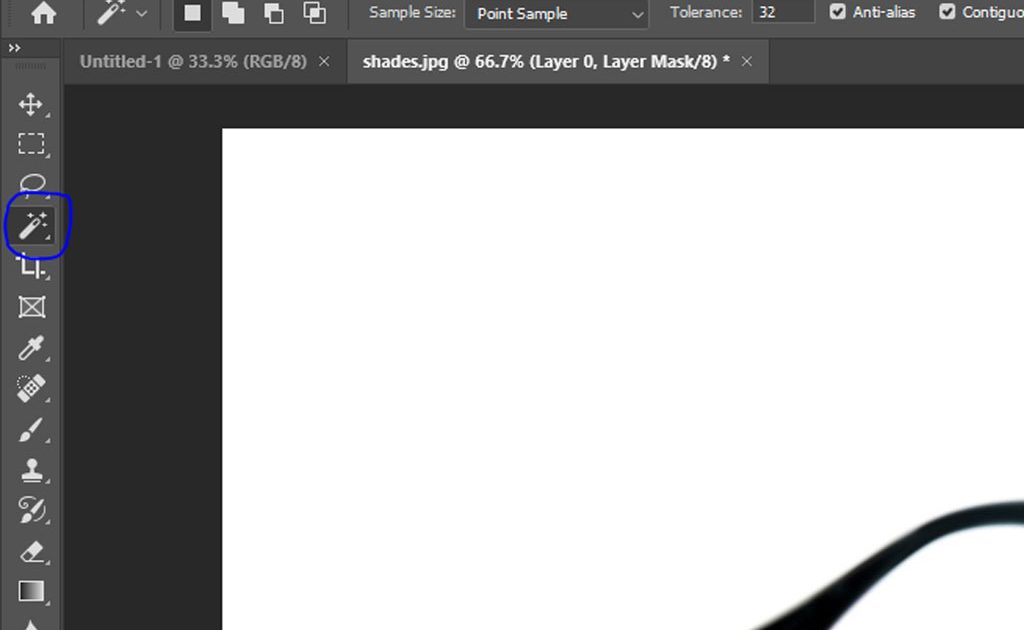
This tool may not be visible if any other subcategory tool is selected. To make it visible, you can simply right-click on that 4th icon and choose the Magic Wand Tool from there.
Step 5
With your layer mask selected – click on the image of your product with the help of the Magic Wand Tool. Make sure that you are not selecting the product but the background because it’s the background that we want to delete.
Your product edges will appear to be selected as dotted lines shown in the image
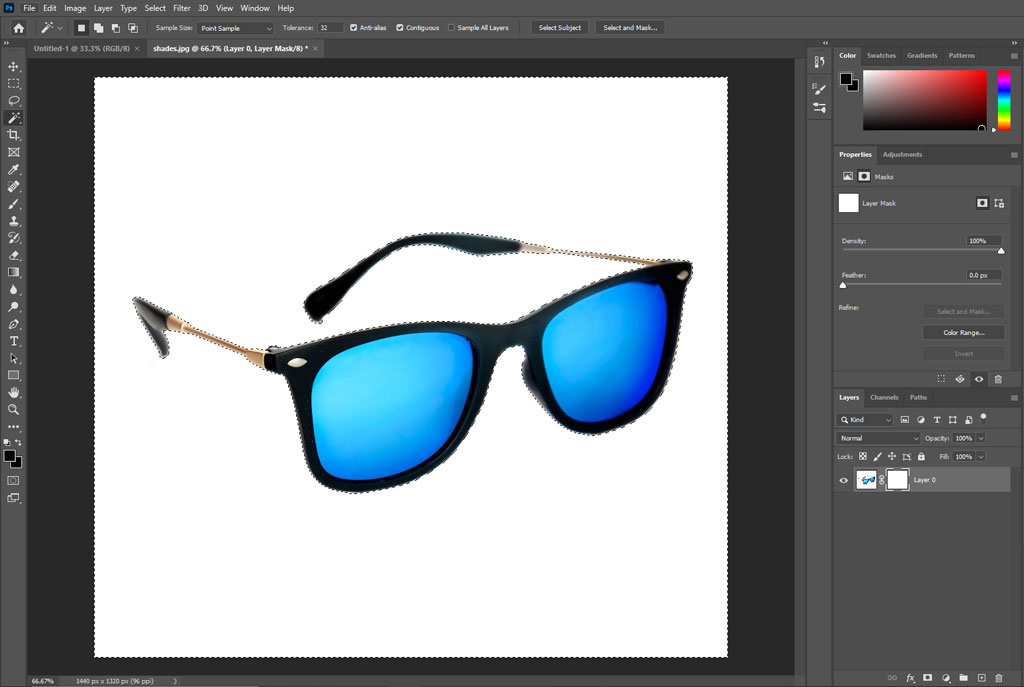
The wand will automatically carve your product out from its background → Press the ‘Backspace’ or ‘Delete’ key and the remaining background will be deleted. Here you go, you learned to the remove background in Photoshop!
Deselect your selection by pressing Ctrl+D for Windows and Command+D for Mac
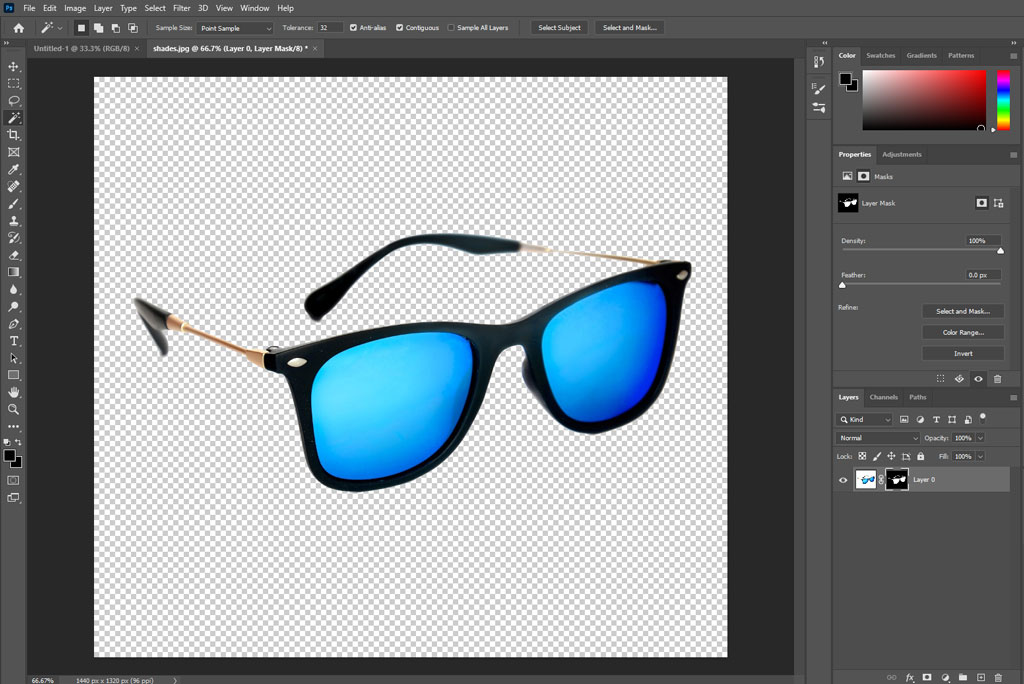
For any small parts that do not get deleted then select those parts once again and click the backspace.
Step 6
Save your file. Go to File → Save as → Name your document and save the file.
It is better to save your file both in .psd and .png (can carry transparency) format. The .jpg (cannot carry transparency) file will be easier to share and will not allow any editing rights, whereas the .psd file will remain with you in its original format and you will be able to make changes later on.
NOTE:
- The layer mask is advised to add only because it allows you to go back to the original image in case you do not like the changes made. It keeps the image intact. If you do not create a layer mask, whatever changes you do while product photo editing in Photoshop, will not be reversed and you might end up deleting the whole design and re-start.
- If you are struggling to remove small details of the backgrounds and the Magic wand Tool is not tracing them as required then → after adding the layer mask → keep the color in your palette ‘Black’ → Select Brush tool and wipe the unwanted area. To reveal back any area → after adding the layer mask → keep the color in your palette ‘White’ → Select Brush Tool and wipe the area that you want back.
Remember, there is this rule in Photoshop where after adding the layer mask to an image – Black = Hides, White = Reveals.
Press ‘X’ to switch between black and white colors.
Importance Of Background Removal Service
When you remove background in Photoshop, it gives you various benefits, namely:
Removes distractions
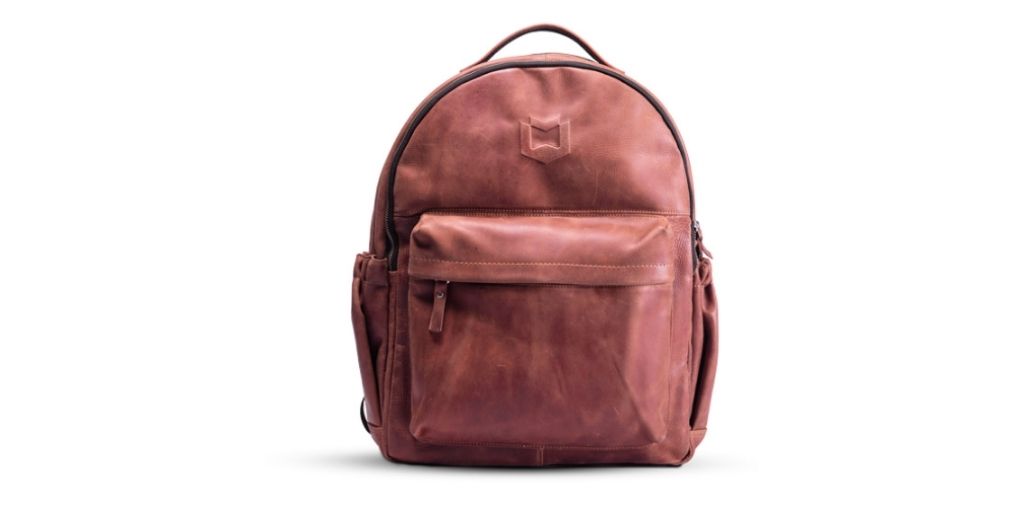
When you click an image of your product, you want your customers to focus on that particular item. With a background, your customers might get distracted or miss some of the details of your product, especially when the small parts are actually the life of your product.
Puts focus
To bring your product in lime-light and to add some other or no background to your image that can complement your product in the most-desired way possible is actually the whole idea behind product image editing – when you remove background in Photoshop, it enables you to achieve this idea.
Intact quality
When you remove background in Photoshop, it opens the gate to mold the viewer’s perspective and enhances the design. Editing can let you convey the same story you want your customers to understand without changing the purpose of losing quality.
Gives clarity
After you remove background in Photoshop, product image editing makes your product look crisp and unique. The writings, measurements or any other details that you add to your product image can be easily distinguished.
As per thegood – more than 85% of people will buy a product just after looking at its images.
This means that you can simply upscale your sale with good-looking images, and this has become easier with the introduction of photo editing software. Color correction, the adjustment in lighting/saturation, and removing background in Photoshop are the key elements to learn when performing product image editing.
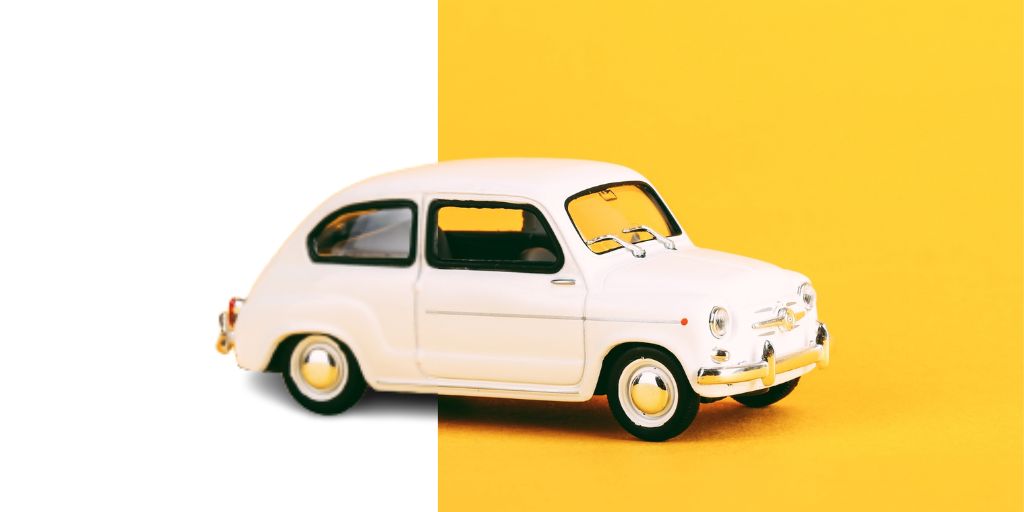
Difference Between White And Transparent Background In Photoshop
Many people confuse having a white background and to remove background in Photoshop (Transparent). Now understand that WHITE is a solid color and TRANSPARENT means no color and nothing at all.
When using a single image for print on a white, it will make no difference. But, if you are making a logo or banner to display on your website, you will have to remove background in Photoshop so the viewers can see the website, otherwise, the white background will block that patch.
The major reason to remove background in Photoshop is when you use layer masks, it will become harder to merge multiple images to make one single image as the white background will provide you coverage.
What Is A Layer Mask?
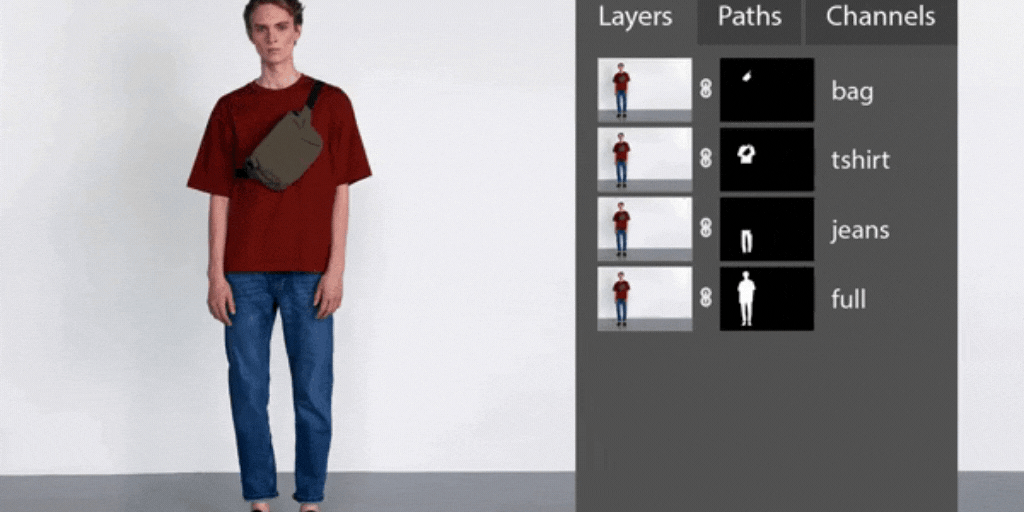
A Layer Mask is a tool in Photoshop that can be added to the top of any image selected for editing. Being a whole different layer, you can make changes in the opacity, transparency, and other edits to an image without actually harming the original one selected. Your changes work as required, will be seen, and will be saved along with the original image being intact.
If you make changes to an image without adding the layer mask, the changes will be done and appear on the original image which will make it harder for you to revise and come back to the original one as you have already manipulated it directly.
These are the small details and tricks that matter a lot, while background removal services can take you a long way.
Conclusion
As this article hovers around learning to remove background in Photoshop – After understanding what is Photoshop and why product image retouching and background removal service are important, we can at least conclude that your eCommerce platform heavily demands your product images be displayed professionally and consistently to attract the eyes of the audience.
There is not only one way to work with Photoshop, but just like everything, there is always an alternative or shortcut to it.
Yes, it is magical, but it is true, and that’s what makes working with Photoshop a real fun and exciting journey. Product image editing and background removal is no task but a fun activity that we bet you will enjoy after learning these easy but detailed steps!
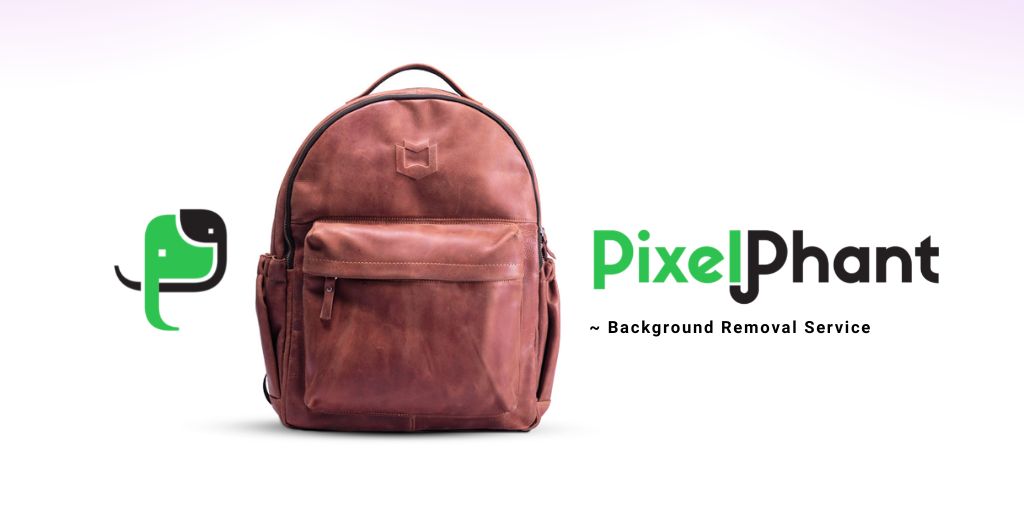
Looking for the best background removal service for eCommerce? Take your free trial with PixelPhant and be more professional.?