Leather Photography Techniques to Make Your Photos More Distinctive & Unique
Leather is a very unique and diverse material. It has depth, it has texture, and it comes in colors that are very distinctive as compared if used with any other material. Most people who like leather like it for its robustness, roughness, and the kind of expensive feeling it exudes.
Photographers who do leather photography products need to be mindful of the perception with which it’s approached. Leather products possess their own character and people love them as it defines their distinct personality.

Leather photography could be sometimes troublesome. It demands a little different kind of angle and light setup that can flatter its texture and material. Being a team member of a professional photo editing service provider, I’ve got my hands on a few tricks that’ll never let you down. In this article, I will be telling you the best ways of how to photograph leather products with a few simple tricks.
After learning the tips and style, you’ll be able to cherish the beauty of leather photography and explore the possibilities of capturing it in the best ways possible.
Important Elements that affect leather Photography
There are some elements that are basic but very important when it comes to leather photography. These elements are so crucial that missing any single piece could ruin something that could’ve been super aesthetic.
I won’t ask you to do too much. Leather in itself is so beautiful, leather product photography doesn’t need your high-end tactics (I know). There are only three things that you need to keep perfect to photograph leather. Let’s learn about them.
1. Light

Light plays an important role in all kinds of photography. Especially, when it comes to leather photography, it may affect its natural color and texture. When using the light for leather photography, try not to use heavy lighting accessories. Remember, here, less is more. I’ll be explaining to you what kind of lights would work fine further in this article.
2. Angle

Angle gives you hundreds of opportunities to capture an image in different variants. Which angle you choose decides from where you’ll be getting the reflection, what part will be exposed or focused the more, and even how catchy your image is going to look in your leather photography.
3. Equipment

Your equipment is the ingredients that’ll help you achieve that one perfect image when you photograph leather products. This includes your lighting equipment, tripod, lenses, best camera brand, and every little thing you use to bring the most out of your image.
These three elements are the only things you need to give your attention to for leather photography. If you succeed in mastering these 3, then there’s nothing more you need further to put in your image to bring it to life.
Now that you’ve understood the importance of these three elements, let’s look at what types will be the most useful for you.
Types of light and their effect when you Photograph leather
1. Soft Light
Soft light is more about the subject and less about the shadow. The transition between the light and the shadows is much smoother. Soft light is generated from a much bigger light than the leather product helps to create a shadow that is much lighter with faded edges. You may decrease this by moving a smaller light much closer.

2. Hard Light
Hard light is basically the opposite of what we learned above. Hard light often casts hard, dense shadows on the object. It is achieved when your light is emitted with a much smaller light as compared to your leather product – Or larger if kept at a distance from where it appears to be smaller.
3. Diffused light
The diffused effect of light is the same effect as the sunlight on a cloudy day. This light is emitted from a concentrated source, bounced through the surrounding, and is spread out evenly. This gives you less harsh shadows of your leather piece.
#Tip: You can achieve this effect naturally in your leather photography. Simply place your leather product in front of a large window that reflects bright light and pull out white translucent curtains. The source (sunlight) will be direct, but the curtains will help diffuse the light.

We recently shared a complete guide on product photography lighting that you can refer to learn more about how to use lighting, and how to set up our lighting equipment to get the best results.
Various angles to Photograph leather – let fall the Variations in texture and Colors
Every change in angle reflects back the different variants of the leather material and its shift in colors. Let’s find out what different angles you can try to bring out the most from your images.
1. Front and Back
This angle is usually explored when you are dealing with leather apparel (jackets, pants). The background is usually kept white or light. The image is taken from a close angle to keep the product in focus.

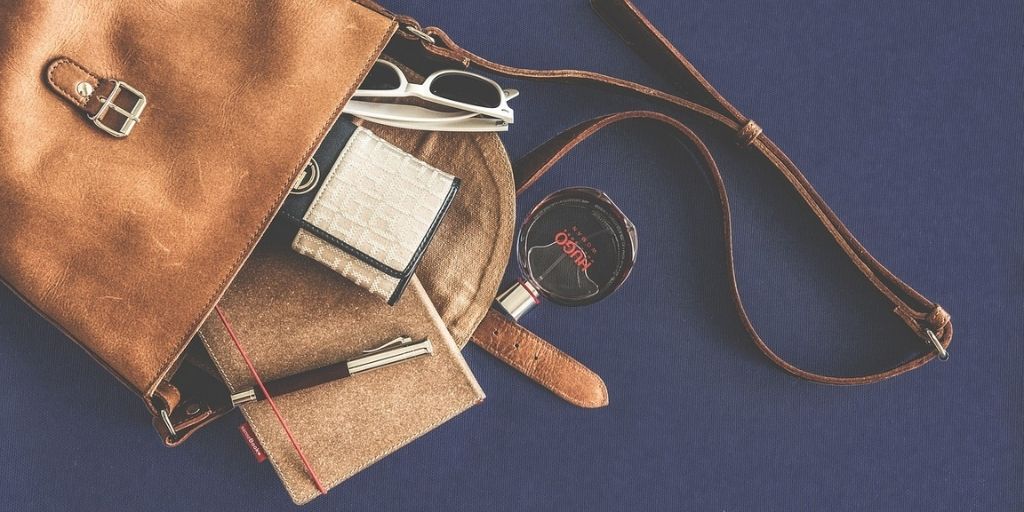
2. Close-ups
In leather photography, close-ups are generally taken to focus on the rough texture of the leather material, logos, stitches, markings, etc. These look beautiful especially when the objects are not too large, such as shoes, wallets, belts, or watches.

3. Texture Shots
These come under the category of close-ups but are exclusively taken from the perspective of capturing the distinct texture of your leather product. In leather photography, texture shots matter a lot as it’s all about revealing the beauty of it. The lighting and the angle here are focused on the aim of caput\ring the details of the texture. You can use a macro lens to get the best results here.

Only 3 types of Equipment for leather Photography
No umbrella lights, no octa boxes. Simply use these three types of equipment to achieve the best results when you photograph leather products.
1. The Shooting Platform
What kind of base you choose to place your leather piece greatly affects the overall look of your image. You can make use of wooden boxes or old trunks to add an old, rustic look to your leather product. Or, you may use a plain, solid background to add a professional, clean look to it.
2. Softbox
Use a softbox, use diffusers, use anything that can give you a diffused light effect. This is must-have equipment for leather photography. It gives you a flawless environment to capture the best images. Again, it is STANDARD equipment for leather photography.
3. Boom Arm
The boom arm is an adjustable arm that is mostly used by podcasters when used with a mic. However, these can be useful with softboxes to provide the overhead lighting needed for smaller leather articles for leather photography.
What are the Best Camera Settings to Photograph leather?
If you have mastered the above-explained lighting, angle, and have aligned your leather product with your equipment as required, then the auto-setting should be fine. Although, you may need to adjust the aperture high and ISO down for a smoother and better look. It completely depends on you and your object’s color. you can also read the best camera settings for product photography.

Useful Post-Production Techniques
Brightness & Sharpness
Don’t be afraid of playing around with brightness and sharpness to experiment. In fact, when you increase these a little, you get incredible details that add a ‘pop’ factor to bring your product to life.
Crop
The crop isn’t just there to trim out the unwanted things. It can be more useful in creative terms too. It can mainly be used for close-up shots or to make distant shots to close-ups.
Color Swapping
You can replace the color of your background if it’s too dark or light. Mainly, it is not advised to manipulate the color of the leather products. As we’ve understood that leather is a unique material, and the color it possesses should be manipulated with the lighting used (mostly if possible).
Tips to Photograph leather Products

- Keep the background color dark and rustic for leather products in their original color (Brown, Bronze, Mustard-brown, etc.)
- Keep the background light, or preferably white for leather products that are bold colored or shiny (Blue, Red, Orange, etc.)
- Try not to lose the texture in the leather photography. Here, it’s not just when the texture is grainy, but for even smooth and shiny leather.
- Make sure that the shine of your leather piece is more like ‘Glossy’ rather than ‘Stinging’.
- Avoid over-editing your images. Not always the adjustments are required. With leather, this is the best leniency to keep your images raw. Here, the more rustic, the better.
Summary
In leather photography, the general method to photograph leather is to use an overhead source of diffused light with the item placed on a shooting table. The table chosen should be the one that best compliments your product. A second low-level light source should be placed next to the camera, then a third to one side – with a reflector on the opposite side to reduce deep shadows.
Too much editing and camera settings are not essential. However, using your creativity to bring out the most depends on every individual.
If you wish to learn more about eCommerce, product photography, Product image retouching, and how to grow online, subscribe to the PixelPhant email newsletter below.