How To Create Depth In Photography?

One of the most challenging techniques is creating depth in photography.
In simpler terms, depth in photography refers to how much of your image is in focus. More technically, it is the distance in an image where objects appear ‘acceptably in focus’ or have a level of ‘acceptable sharpness.’
No matter your experience or the camera you use, understanding the depth of field is important in the photography business.
It influences every genre from intricate macro shots to wide, portraits to products, offering a creative expression that can elevate your images on your eComm website.
Also, outsourcing to a professional eCommerce photo editing service can take your business one step ahead of competitors.
In this article, we’ll explore key techniques for creating depth in photography to make your product images stand out.
Table of Contents
What Is Depth In Photography?
Depth of field In photography refers to the range between the closest and furthest points in a frame that remains acceptably sharp and in focus.
When a camera focuses on a specific point, anything further away or closer to that point will appear progressively blurrier.
The primary factor in controlling is the camera’s aperture or f-stop, with the depth of field being inversely related to the aperture size.
A larger aperture marked by a smaller f-stop number (f/2.8 – 5.6), results in a shallow depth of field. This creates a selective focus effect where only a small part of the image is sharp, and the rest is blurred.
On the other hand, a smaller aperture represented by a higher f-stop number (f/13–22), produces a deeper depth of field, keeping most of the frame in focus.
Key Techniques For Creating Depth In Photography
Aperture Control
Smaller aperture (higher f-number)
A smaller aperture increases the field depth in photography, meaning more of the product will appear in sharp focus. This makes it ideal for showing the full product in product photography.
Larger aperture (lower f-number)
If you want to isolate a specific part of your product with a blurred background, use a wider aperture, but be mindful of shallow field depth in photography.
For example, a smaller aperture (higher f-stop number) is ideal in eCommerce photography, usually between f/8 and f/16.
This results in a deeper depth of field, ensuring more of the product stays in focus instead of just a small portion with a blurred background. This is crucial for displaying the product details in photography clearly to potential customers.
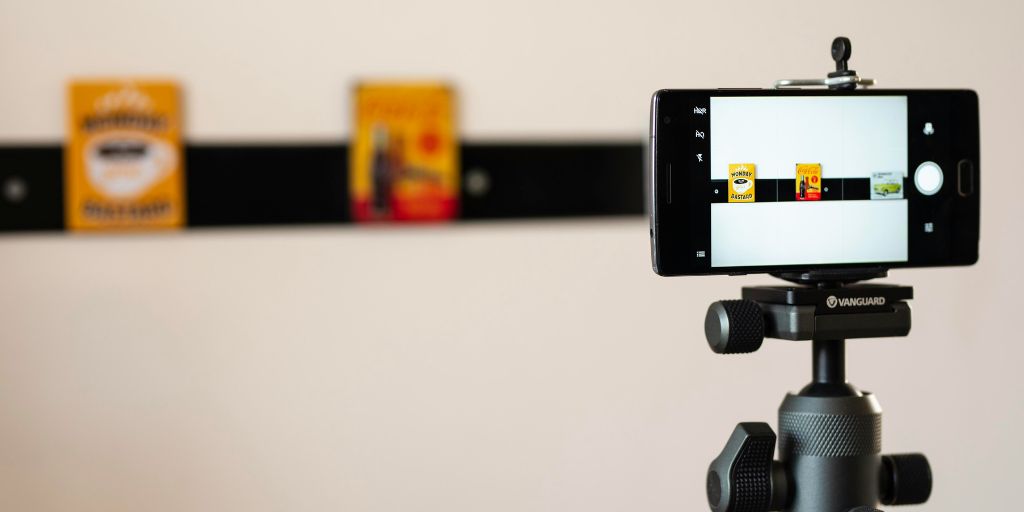
Tripod
A tripod helps stabilize the camera, ensuring steady shots and consistent composition, which is particularly useful when shooting with smaller apertures for a larger depth of field.
ISO Setting
The ISO setting determines the camera’s sensitivity to light.
For eCommerce photography, it is best to use a low ISO setting, such as 100 or 200 to avoid grainy or noisy images.
Lighting Techniques
Portrait Lighting

Portrait photography is all about capturing the individual’s character.
A common technique is the three-point lighting setup, which adds dimension and depth in photography to the subject’s face.
This setup uses a key light as the primary light source, a fill light to soften any harsh shadows, and a backlight to create separation between the subject and the background.
By using soft, diffused lighting, we can avoid creating sharp shadows and instead highlight the subject’s features.
- Key Light: The primary light source, typically positioned at a 45-degree angle from the subject.
- Fill Light: A softer light, placed on the opposite side of the key light reduces shadows created by the key light.
- Back Light: Positioned behind the subject, this light adds depth in photography and helps to distinguish the subject from the background.
Product Lighting

Product lighting is carefully controlled to highlight the product’s textures, colors, and shapes.
High-key lighting setups, often utilizing softboxes are commonly employed to create a clean and simple appearance.
A mix of hard and soft lighting can enhance the product’s material and texture. Hard light emphasizes sharp shadows and contrast, while soft light reduces shadows and minimizes reflections.
- Soft Light: Provides uniform lighting, often achieved with softboxes or diffusers.
- Hard Light: Emphasizes texture and contrast, typically created with direct, undiffused light sources.
Composition and Styling
Trying different design techniques to add depth in photography is key to making products grab the attention of potential customers.
Framing
One such method is framing, which proves highly effective in creating compelling images that emphasize your products. Framing involves using elements within the image to direct the viewer’s focus toward the main subject.
By incorporating framing, you can add dimension and depth in photography, drawing attention directly to your product.
When applying framing in product photography, consider the frames you can use for each shot. Look for natural or architectural features like doorways, windows, or other elements that can serve as effective frames for your product.
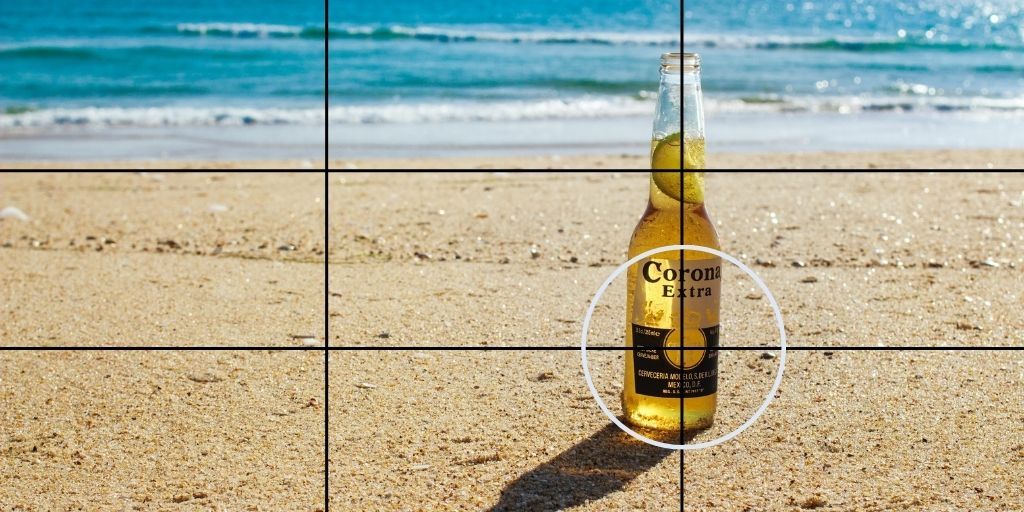
Rule Of Thirds
Another effective way is to apply the rule of thirds.
This compositional technique divides the image into nine equal sections with two horizontal and two vertical lines intersecting at four points. Placing the subject or product at one of these intersection points results in a more engaging and well-balanced image.
To use the rule of thirds effectively in product photography, start by identifying the main focal point of your shot which could be the product, its packaging, or any brand-specific elements.
Once the focal point is pinpointed, position it along one of the horizontal or vertical lines or at one of the intersections to achieve a harmonious balance and symmetry in your composition.
Leading Lines
Leading lines have a compositional technique that elevates an image by guiding the viewer’s eye toward a particular focal point. These lines create a sense of direction and movement within the photograph, enhancing its overall flow.
In product photography, using leading lines involves carefully considering the placement and orientation of your subject.
For instance, diagonal lines can introduce energy and movement to the image, especially if you position the product at an angle or incorporate props like arrows or pathways.
Alternatively, horizontal or vertical lines can help establish a sense of balance while highlighting specific features of the product.
Foreground elements
Foreground elements refer to visual components between the camera and the main subject. An image can typically be broken down into three layers: the foreground, middle ground, and background.
These elements offer context, create unique compositions and help enhance depth in photography.
Symmetry And Asymmetry
Symmetry refers to a harmonious arrangement of elements. If you were to draw a line down the center, both halves of the image would mirror each other or be nearly identical.
This balanced photography composition & angles convey a sense of stability and order, which makes it ideal for showing products that emphasize precision or accuracy.
On the other hand, asymmetry involves an intentionally unbalanced arrangement, where objects are placed off-center or unevenly spaced.
This technique can introduce a feeling of movement and dynamism, making it perfect for showcasing energetic, complex products or multiple parts.
Image Cropping
Cropping is a valuable technique in adding depth in photography that helps eliminate unwanted portions of an image.
By removing distractions, adjusting the aspect ratio, and focusing on close-ups, cropping offers various ways to enhance composition and draw attention to what matters most.
When used effectively, cropping can highlight key aspects of the product, bringing it into focus while reducing unnecessary distractions from the background or surrounding elements.
Post Processing
Even the best-clicked photos need professional post-production work.
Consider outsourcing to a professional eCommerce photo editing service like PixelPhant. These services offer a range of options, from basic edits to more advanced retouching. They include background removal, photo retouching, color correction, shadow removal, clipping path, and ghost mannequin services.
PixelPhant offers end-to-end solutions for eCommerce and photography studios. Express delivery options are available in as little as 2 to 3 hours, and basic pricing starts at just $0.40 per image.
Taking The Next Step
Now that you understand how to create depth in photography for e-commerce, it’s time to apply these techniques.
Start by evaluating your current product and model images. Identify areas where depth in photography could enhance the image. Experiment with aperture settings, lighting angles, and creative compositions to bring them to life.
If you’re new to these techniques, consider investing in a basic photography setup or consulting a professional to guide you through the process. Many tools and resources, including online courses and editing software companies, can help refine your skills and elevate your eComm website.