How To Capture Accurate Colors In Photography?
Lighting, composition, and color are the three main pillars of photography. While the first two have challenges, getting accurate colors in photography is a different game.
There are many elements, including your camera, camera lens, setting, LCD, and monitor on which you see the image. In addition, the editing style and your process of optimizing your photos play a crucial role.
So, to help you get accurate colors in photography, here are four tips for you.
Four easy but most efficient ways recommended by professional photographers to help you capture accurate colors in photography.
Let’s get started.
What are accurate colors in photography?
Getting accurate colors in photography means matching the color tone of the product in the way the product is in real life.
In most cases, color doesn’t play a very important role. Sure, the red should be red, and blue should be blue, but a little difference in vibrance and tone won’t be a huge issue.
But when you are doing product photography where getting the right color is very important, you’ll need to make sure the product and image color match each other.
One of the most common reasons for product return for eCommerce is the visual difference between the product on-site and in real life.
As a photographer, it is important to make sure that the product images are color accurate across the online store.
4 Ways To Get Accurate Colors In Photography
Capture in RAW format
RAW is an image file format that professional photographers use in order to capture all the information from the sensor without optimizing it.
Where other file formats like JPEG compress the image file by reducing the details, RAW file format stores every little detail accurately.
A RAW file that you capture can store over 66000 colors of an image. On the other hand, JPEG files only have 6000 colors.
Moreover, when editing a JPEG file, the image keeps colors compressing and, after some time, loses the original clarity. Since the RAW file doesn’t compress, the details of the image are never lost.
These details are very important since they ensure that you are able to capture accurate colors in photography.
You must also note that since there is no compression of the file, the size of every image in RAW format is two to six times larger than JPEG.
Setup your WB mode
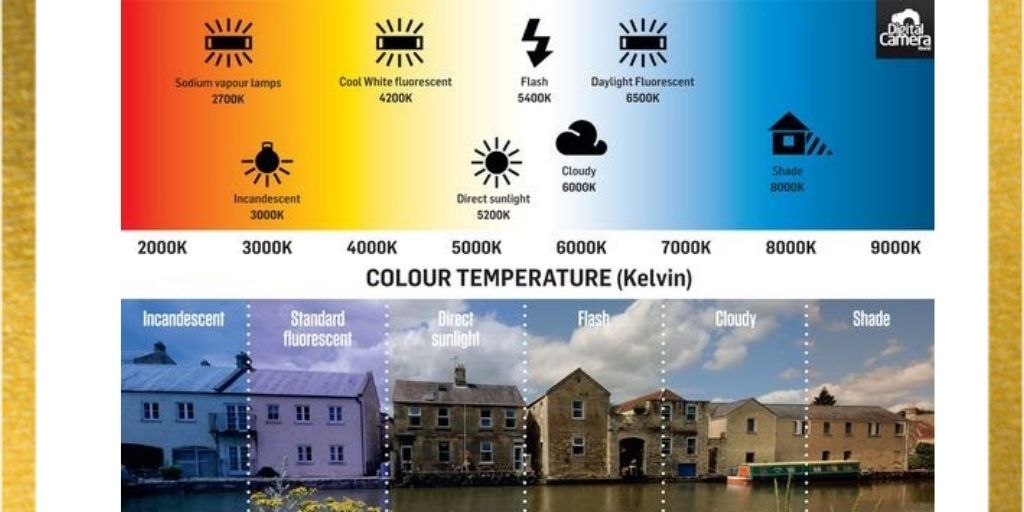
Every light source has a different color. Some light sources are warm, whereas some are cool. Depending on these light sources, the color of the product is easily influenced.
In warmer tones, the product will look more yellow. In cooler colors, the product will be more blueish.
This color tone depends on the source of light and how your camera interacts with it. This setting is controlled using White Balance.
Many photographers, as a beginner, choose to capture products on Auto White Balance settings.
While it may work for some scenes, it is important that you learn to correct the white balance of your image.
To avoid any additional effect of light on your product image, set your white balance to match the scene.
In order to help you get started, we shared a complete guide on White balance in photography for eCommerce. This will surely help you get accurate colors in photography, taking you a step closer to what you aim for.
Maintain right exposure

Exposure is the photography setting that controls the amount of light that reaches the camera sensor. It is not the first set that is associated with the colors, but it is.
You’ll observe that when your image is underexposed, the colors become over-saturated and too dark. On the other hand, when the image is overexposed, the image will become noisy, and the colors will be lost.
There are three ways to control your exposure settings, which are:
- ISO
- Aperture
- Shutter Speed
Balancing these three camera settings assists you in controlling the exposure and capturing accurate colors in photography.
Use gray card
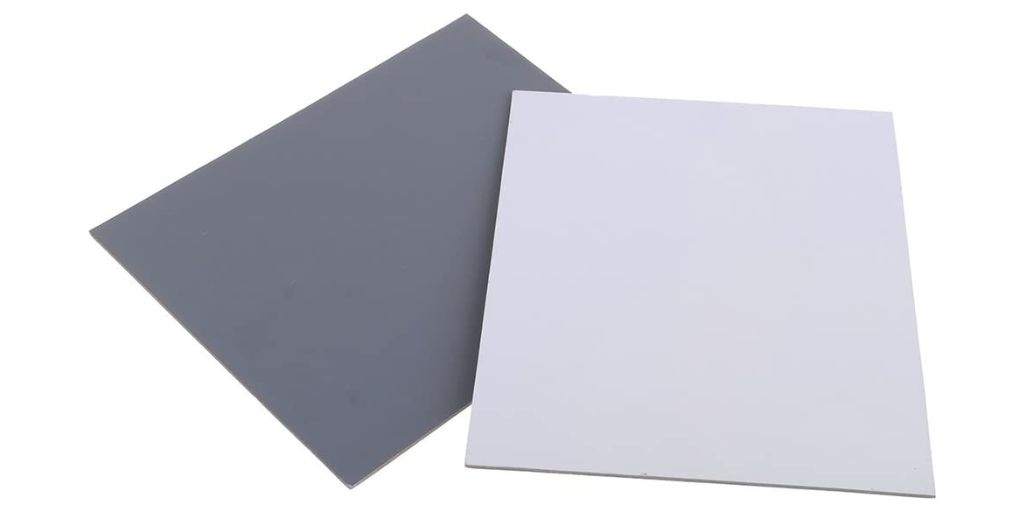
Gray card is a simple but highly effective photography tool that helps calibrate the camera with the lighting.
To get started, take your gray card and put it ahead of your camera. Now, press the shutter button halfway to activate the camera’s meter.
Now, with your manual exposure, adjust your setting until the arrow in your meter is in the dead center. This will help you find the right gray for the lighting setup.
Once the setup is done, you are all set to capture accurate colors in photography til your lighting conditions stay the same.
Bonus Read
Since photography is a creative and technical field, getting accurate colors isn’t necessary. But whatever the case may be, it is essential to be aware of how images are getting processed by your camera.
These learning and practices help photographers become experts on every scene and capture the subject in the intended way.