What is Aperture in Photography? Beginners Guide
What is Aperture?
Aperture in photography is the relation between light and the camera. It is a camera setting that you can control to allow the amount of light that enters your lens.
For example, if you photograph at night and need more light to enter your lens, you’ll increase your Aperture. If it’s too bright, you’ll need less light to enter. Here, you will decrease the Aperture for photography.
As a photography beginner, you have to understand this manual camera setting. Aperture in photography controls how dark or bright your image will be. Ideally, we look for balanced lighting.
What is the function of Aperture?
There are mainly two functions of Aperture in photography.
Controls the exposure – It controls how much light enters the lens and how bright the image will look. The higher the aperture value, the darker the image will be.
Controls the sharpness of the image – It also controls how soft or sharp the image will look. A lower aperture value means the image will be gloomy and soft. On the other hand, a higher aperture value means a sharp and crisp image.
As you can see, the aperture setting is a trade between exposure and sharpness.
If you go large aperture (lower aperture value), your image will look bright, but then it’ll be soft with a blurry background. And if you go for a smaller aperture (higher aperture value), your image will look dark but will have a sharpness and clear background.
What is an example of an aperture?
Here are a few examples of how to use aperture in photography and how to balance your image’s exposure and sharpness like a pro.
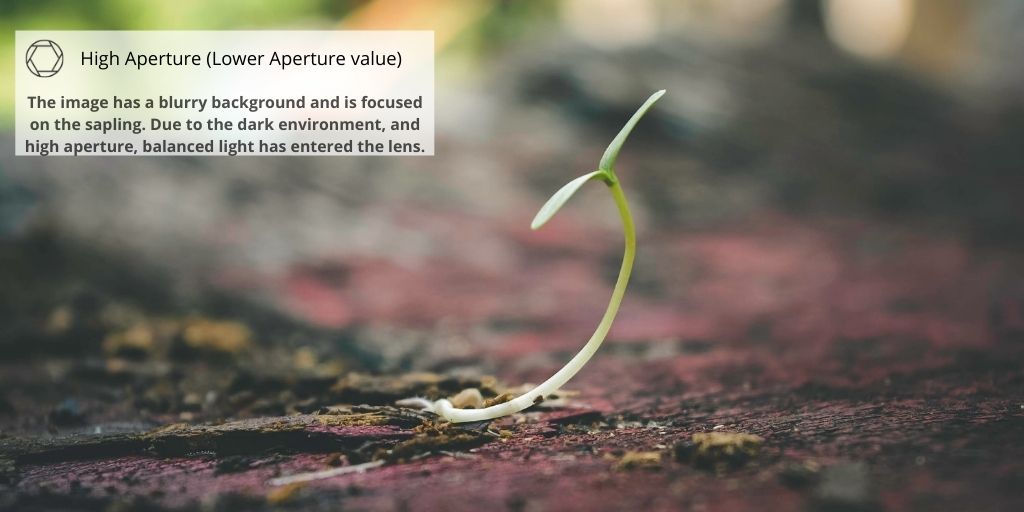
Above the image has a high aperture, which means the value of the aperture is set to lower digits. This resulted in focusing on the closer object (in this case, sapling) and blurring the background.
Now when the exposure is balanced by editing and the environment. Dark surroundings let only some light enter the lens despite the high aperture setting.
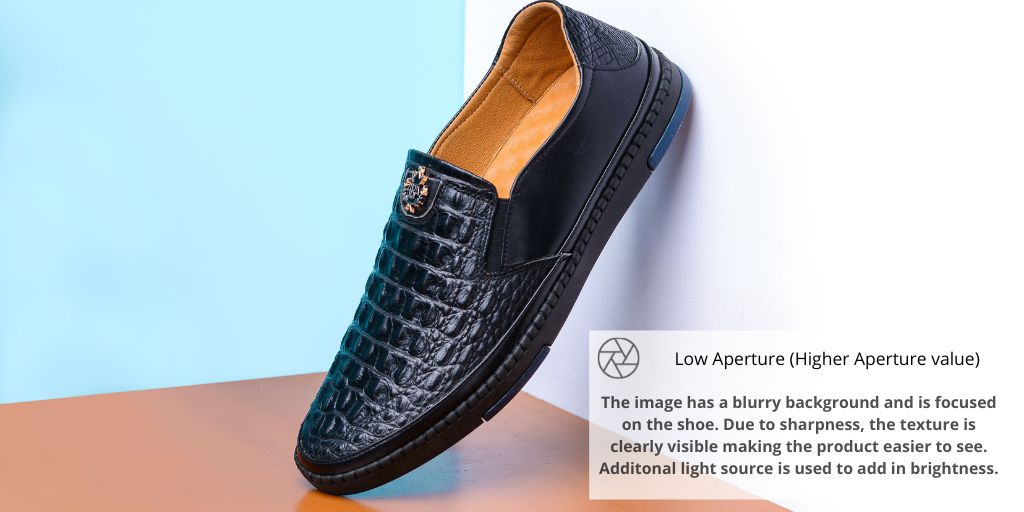
On the other hand, the above image of the shoe is captured at a low aperture (higher aperture value). The details, texture, and sharpness of the image are clear. But to overcome the darkness, an additional light source is used.
How do you choose aperture in photography?
To choose the right aperture value, you’ll have to balance the image’s sharpness and exposure.
If you are capturing a product at a lower aperture value, you will have to ensure that ample light is falling on the product. Also, if you are capturing a product at a higher aperture value for the bokeh blur effect, you’ll need to make sure that the lights are dim.
As a photographer, you must balance both elements equally per the requirement. I’ll also suggest you learn about using ISO for photography and your camera’s Shutter speed.
They will further help you improve your photography skill and control how your photograph turns out.
How is the aperture in photography measured?
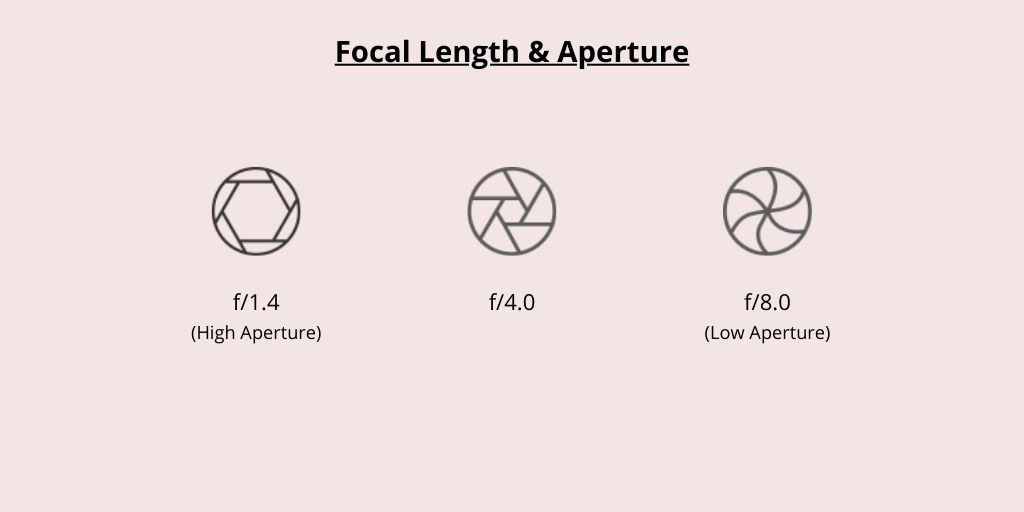
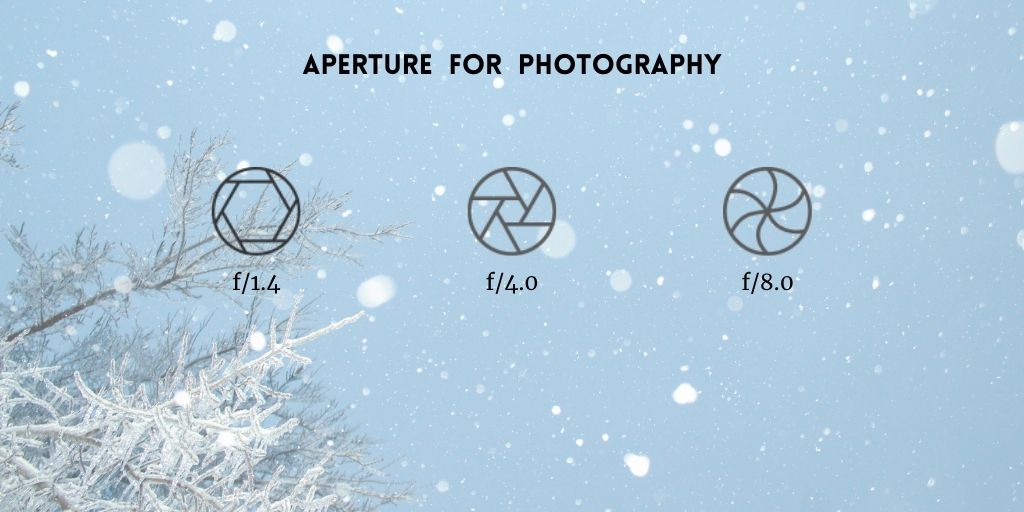
To measure the aperture in photography, we use the lens focal length, denoted by f/. The lower the value of focal length will be, the wider the aperture is. The higher the value of focal length will be, the smaller the aperture is.
At what Aperture is everything in focus?
Ideally, the f/11 focal length of the Aperture helps in bringing everything in focus. To do so, you’ll need an excellent source of light that can ensure that the product is visible even though only some light is passing through the lens.
Bonus Read
The best way to learn about photography’s aperture is by actually playing with it. Choose your camera and start capturing images at different focal lengths without worrying about the result. Add in your external light and find what works best for the situation.
Even when you are doing professional photography, try out different aperture settings and studio lights to find what works best in that scenario. Over time with practice, you’ll skill up and know the best settings for every scene you want to capture.
It is also suggested to use a professional photo editing service to bring the most out of your professional photography. A service that can make your eCommerce and editorial image stand out and be eye-catching. If that is something you want, get a free trial of PixelPhant’s product photo editing service now.