Ghost Mannequin: Learn Invisible Mannequin Photography
Images that bring your products to life are important for generating sales.
Especially for fashion retailers. But does it mean having real people wearing and using your product?
No one can deny that hiring a model can be expensive. This can increase your eCommerce image production and post-production costs by a huge margin.
And this becomes even more considerable when you have to make sure that all your images are visually consistent.
That is when you can use a mannequin to capture your products. And in order to avoid any alienating, you can use Ghost Mannequin or Invisible Mannequin service.
To help you get started, we are sharing everything you need to learn about ghost mannequin photography and ghost mannequin photo editing for eCommerce.
What is a ghost mannequin?
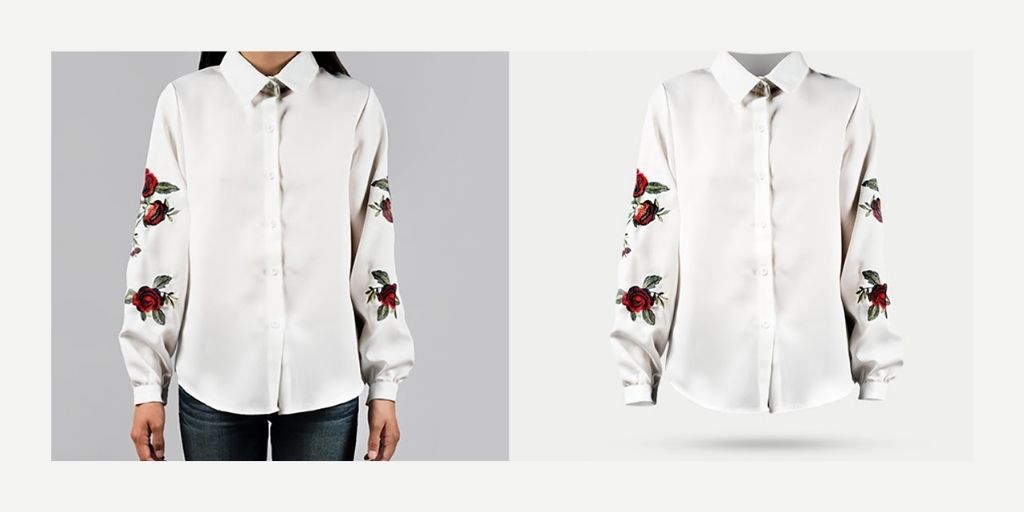
Ghost Mannequin Photography is a way to showcase apparel products, with the help of mannequins to give an effect of an invisible person wearing the clothes. This is used to make sure the clothes look the way they would on a real person—without any distraction from a model or mannequin in the image. Because of this effect, the style is also known as an invisible mannequin or hollow man effect.
Steps to photograph ghost mannequin for eCommerce
At first, ghost mannequin photography might seem a little complex, but let me assure you, it’s not. The whole process can be boiled down to three easy steps.
- Capture the full body shot by putting it on the mannequin or model.
- Capture the part of the cloth that was hidden when the mannequin or model was wearing it.
In order to practice ghost mannequin photography, you just have to follow these two steps. But if you are just starting out your professional eCommerce ghost mannequin photography career, you might enjoy reading the following step-by-step guide on how to do things right.
1. Plan out your shoot
The first step stays the same. Plan out your shoot and learn what you want out of it.
Some key factors that you must discuss beforehand are
- Type of product that you are shooting
- Number of sides you need to shoot
- Part of the apparel that must be highlighted
These are small details that you must plan as they won’t take much of your time but will surely save you a lot when you start ghost mannequin photography.
2. Follow a style guide
In order to make an eCommerce visually different, art studios and creative managers create a personalized style guide for eCommerce. This includes the way the products are captured, the kind of lights they prefer, the background of the image, sides from which a product is captured, and the number of shoots.
As a photographer, it is very important that you understand these requirements very thoughtfully and give only your professional advice if required. Put your client’s requirements first and go with what they find the best suit for their eCommerce.
3. Clean up and adjustments
It’s the day of the shoot now. Put the clothes on the mannequin and make it fit using tape and pins. Flaunt how the dress will stick to the body and what shape it will take on the body.
Don’t worry about any visible pins or creases as they can easily be taken care of by the post-production service. Now, before finally capturing the clothes, just remove any dust or lint from the cloth. The product will look fresher and more attractive.
4. Capture & share
At this point, you can start ghost mannequin photography. And to make it much easier and continuous, make sure you shoot different parts of the clothing together. This will give a serial number to all the images and it will be much easier to group the images for post-production.
For example, if you are shooting a t-shirt, put it on the mannequin and capture it as the body. Then remove it from the mannequin, and hold it on the mannequin to show the collar of the t-shirt.
Now the images will be closer to each other as they are captured one after the other.
Essential equipment and set-up
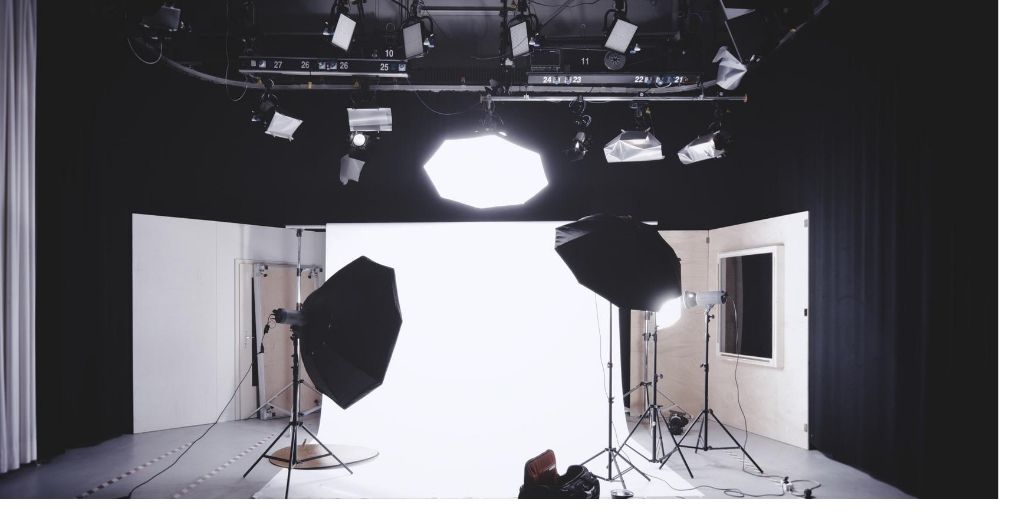
In Ghost mannequin—the camera techniques, lighting equipment, and placement of the mannequin all become a very important discussion. On the basis of each particular product which you are about to shoot.
At the time when you are capturing the top parts, it is important to place the camera up to the direct level of the chest area. And for clicking the lower part the camera should be placed across from the hip area. Capturing a product from an angle that is either at a height or is too low can make the garment look tapered and inaccurate.
It is also recommended to always get the telephoto zoom lens to click your ghost mannequin images as it will help you to minimize the distraction. This will offer you the flexibility to move closer to small-sized objects and farther away for larger objects.
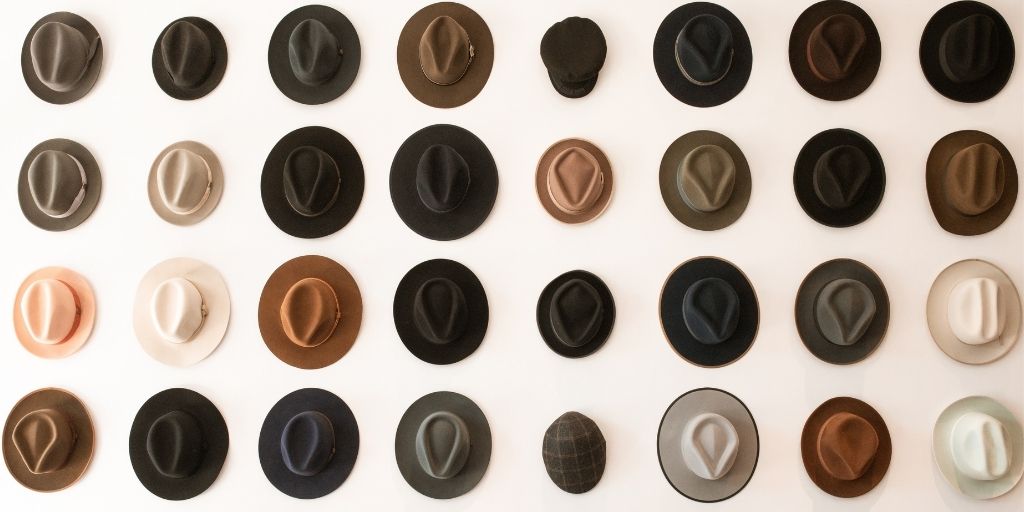
Benefits of invisible mannequin photography
There are mainly 5 benefits of using an invisible mannequin service for eCommerce.
Consistent Images
When you are working with models, you will always have to make sure that there is consistency in all the images. This becomes even much harder when you are dealing with 100 or thousands of images.
But in the case of the invisible mannequin photography, all you need to do is put the clothes on the mannequin and capture it. Obviously, they are not going to change their pose and that gives you one less thing to worry about.
Faster Turnaround Time

Invisible Mannequin images have a much faster turnaround time than regular model photography and model image retouching. As there is no time wasted in skin touchup, fitting, accessories, etc, an organization will find using ghost mannequin photography and photo editing service much quicker.
Cost-Efficient

For any business, cost control is one of the major highlights of any decision. And when it comes to ghost mannequin photography and photo editing service could be one of the best financial decisions for any eCommerce.
Firstly, a mannequin is a one-time investment that will help you for years. And even the image editing for invisible mannequins is less compared to a model image retouching.
Zero Distractions
If you are using models, or props in your product images, your customers can easily get distracted. And every successful eCommerce knows how important it is to keep the customers engaged with the product.
That’s where using the invisible mannequin truly comes in handy. As the images only consist of the product, it is both engaging and informative about the product—without any distractions.
Better Understanding
Ghost mannequin photography is a great medium to showcase the clothing as it gives a better understanding of how it will fit. You can get mannequins in any style and size which further give you a wide range to showcase a product.
From the perspective of a customer, an invisible mannequin really helps to understand the types of material and get the attention much quicker even if you use it in your ads wisely.
Step-by-step ghost mannequin photo editing
After clicking the pictures, the creation of the ghost mannequin effect becomes so simple actually. In this also you have 2 options with you, either you can do it on yourself or can outsource it to the ghost mannequin photo editing services like PixelPhant.
Generating the ghost mannequin photography is so simple. accustomed that you are having adequate and proper post-production software. Your image should be photographed properly. Outsourcing ghost mannequin service will help you save your company a great amount of time and frustration.
In case you want to create the edits by yourself, then follow the below 7 easy steps to get your own invisible ghost mannequin effect in Photoshop.
1. Create the layers by opening files in Photoshop
As a first step, open your mannequin images in photoshop with the foam board image. Choose your ghost mannequin images, and create a new background layer. Fill the layer with white as it will be helpful to give you the overall background when you are done with the image at last.
2. Select the product in the mannequin image with a selection tool
Second, comes the selection process for your mannequin image. zoom in and select the best tool among the pen tool, lasso tool, magic tool or with the quick selection tool. All these tools will help you to acquire the desired result of the selection process.
It is important to think that, using a white background at the time of shooting will offer you to erase off the mannequin easily. It happens because of the color selection between the product and the background.
3. Refine the image and place your mask
When you are done with the selection of images, refine your mask to make it tight and nice. This step can be completed with the refine edge tool in the select menu. Place your mask by clicking OK in the refine edge dialogue box. Now at this particular point, you will be able to see your product floating freely on the white background created in the beginning.
4. Repeat the above steps with the foam board image
It is high time to switch gears and replicate the 1, 2, and 3rd steps on your foam board product image. Now here the image will be seen as odd at first but it is essential to have the one-two work with. Capturing the product from the inside will offer you the full inside view, acquiring the ghost mannequin illusion. We assure you that it will appear great at the end.
5. Fuse up the images
when you have to drag both the mask from your foam board image onto the image of your specific invisible mannequin product image when completed with the tight and clean masks. Make the organization of layers, such that the foam board layer seems to be lower than the mannequin effect. After this, position your foam board layers and adjust the proportions so that it perfectly fits in
6. Remove non-essential elements of the foam board layer
Now at this stage, it is a bright idea to hide your mannequin layer and remove all the unwanted parts of the foam board layer. You really only need to keep that neckline triangle between the shoulders. It’s important to remember to remove that piece in the foam board image because it’s already in place in the mannequin shot.
7. Include the shadows and save
In the end, add the shadows in between the two layers. And give the specific product some depth and then save the copy of the photoshop file including all of the layers intact, just to be safe. As you have saved the layer file, flatten, or merge all the layers. Again save the image as a different file. This last step will create a professional look at your image and a realistic one.
Also Read – Importance of Shadows in Product Images
How PixelPhant’s Ghost Mannequin Service Works?
At PixelPhant, we ensure that all the ghost mannequin images are edited by the experts using a series of steps to ensure quality. Here are a few steps we follow in order to edit your invisible mannequin images.
- We ensure that the multiple parts of the final image are stitched together perfectly the way they should be. No visible line or difference in texture or pattern should be seen. That’s our topmost priority in invisible mannequin images.
- We remove any tape or pins from the image that are visible in the final cut. In addition to that, we get rid of any unwanted creases and lint to make the clothing look fresh and attractive.
- In our third step, we adjust the shape of the clothing. This is to ensure that the product looks much more appealing and to help the customers easily visualize how the cloth will look on them.
- And lastly, we make the image your eCommerce fits. That is, if requested we switch the background, edit the colors, leave margins, crop the image, and send the file in the format that you asked us in.
And in these 4 steps, we send back your invisible mannequin images within 24 hours (or maybe even sooner sometimes).
Conclusion
With the final step, we wrap this guide on ghost mannequins or as some will say invisible mannequins service. If you have any bulk apparel images that need to be edited by our ghost mannequin experts then take your free trial now.
Also, if you wish to learn more about product photo editing, photography, eCommerce, and more, then subscribe to our newsletter below?