How To Create Efficient Product Photography Workflow?
Creating an efficient product photography workflow for eCommerce can be extremely rewarding. Eliminating mistakes can save you time and cut down on costs.
But often it’s hard to create a customized workflow for product photography post processing. When each eCommerce product photography project is different, it is fairly obvious to have a different approach towards them.
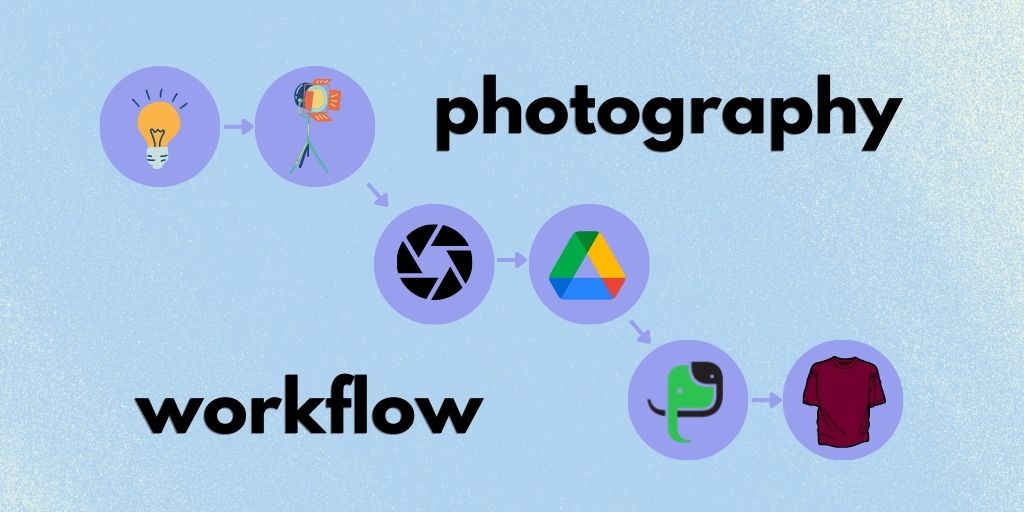
In this article, I share a complete and efficient product photography workflow structure that you can use to build your process. You’ll get some ideas on how to enhance your product photography editing efficiency so you can follow the process according to your requirements.
So without taking any more time, let’s start with the first point of creating an efficient product photography workflow.
Table of Contents
Steps To Enhance Your Photography Workflow
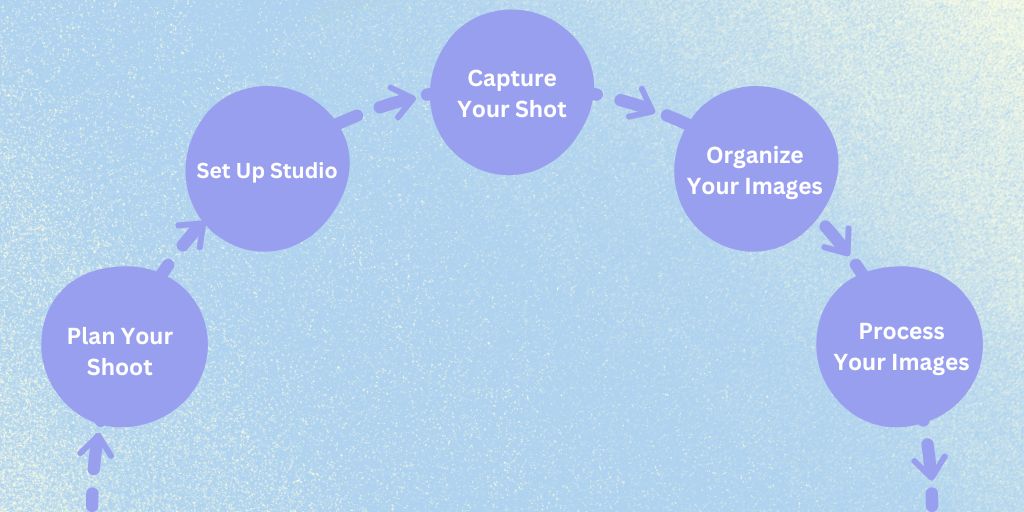
Plan Your Shoot
The best part is that you are already on the path of planning, which is good. Planning will give you much more insight into your organization’s or client’s expectations and help you deliver exactly that.
During this stage of a product photography workflow, focus on these few 4 things
Type of shoot
This will include important things like indoor studio photography or outdoor photography, as well as model photography or mannequin photography (or anything else).
If it’s a mix of both, this is the stage where you plan them according to your eCommerce preference.
For example, if you are working with apparel eCommerce that uses mannequins and model photography, look at the product images and see what is featured image among all types of products.
If they feature the model first and then compliment the ghost mannequin image, an efficient product photography workflow would suggest you plan model photography first. This way, the product can be uploaded and set ready for sale. Other mannequin images can be uploaded later when they are ready.
Organizing process
This is a key process. When you are working with more than thousands of images a day, you must have an organizing process. This will include the number of images per product, their angles, and the series in which they will be shot.
We have discussed organizing your images further in the article, but since you are planning, it’s a good practice to think about the whole process thoroughly.
Image sharing setup
The next step in planning an efficient product photography workflow is choosing a setup to share your images with the eCommerce or product photo editing team. One of the most common ways is to upload them to Dropbox or other types of cloud storage and then share their link/access with your photo studio team.
While there are dedicated platforms for sharing images with the team, nothing has come closer to the efficiency and ease that Dropbox or other cloud storage platforms provide.
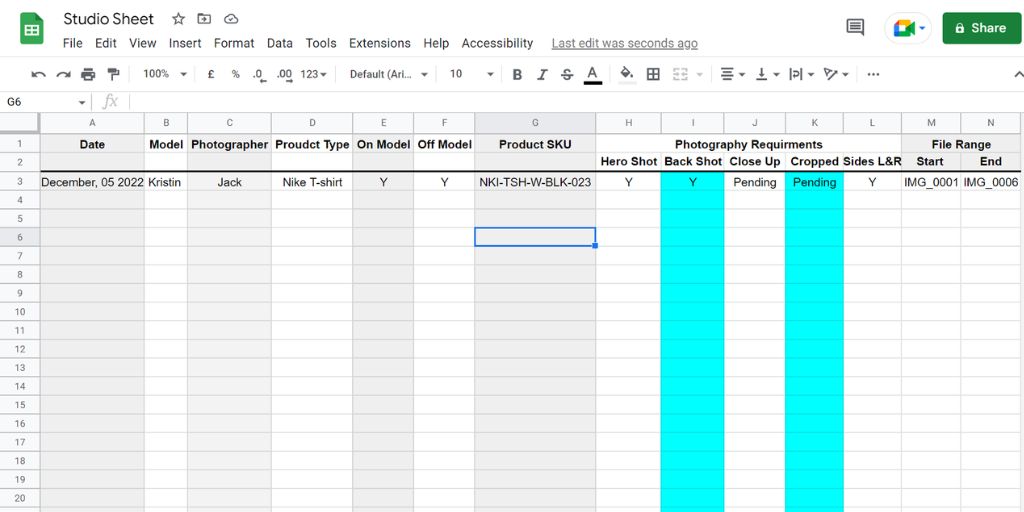
Create a spreadsheet
To keep things simple and easy to track you can create a spreadsheet of all your products. With Google Sheets, it is easier to put all your products together and track their progress and stage.
Here’s a quick example of what your spreadsheet might look like:
Set Up Your Studio

Your product photography studio is an integral part of creating an efficient product photography workflow for eCommerce. But to achieve that state of excellence here are a few steps that you must follow.
Prepare your equipment
Without being dramatic, your equipment is your weapon here. But they are only as good as you use them. So make sure you are working on your skills and using them to the best of your capabilities.
A few things to remember during eCommerce product photography workflow are:
- Make sure the camera lens is clean with no fingerprints or dust on it.
- Use a steady tripod to fix your camera in one position.
- Ensure that all sides of the product are well-lit.
- Use proper lighting to differentiate the product from the background.
- Use tape to tie cords of your equipment to keep the studio tidy and organized
Prepare your product
Now that your equipment is ready, it’s time to prepare your products. Efficient product photography workflow for eCommerce means eliminating mistakes and preparing your products is a key step here.
Here are a few things that you should keep in mind.
- The product should look clean and crisp.
- There should be no stains or spots on the product.
- Use a lint brush to remove any list over the clothes.
- Steam iron if your products have too many wrinkles on it
Create small tags that contain product information. Like the size of the product (S, M, L, XL, etc.), who it is for (Men, women, kids), its brand (Nike, Puma, Adidas, etc.), and its color (white, blue, etc.).
All this information will help arrange the products and rename them during post-production. Once the tag and products are ready, put them together and focus on the next step.
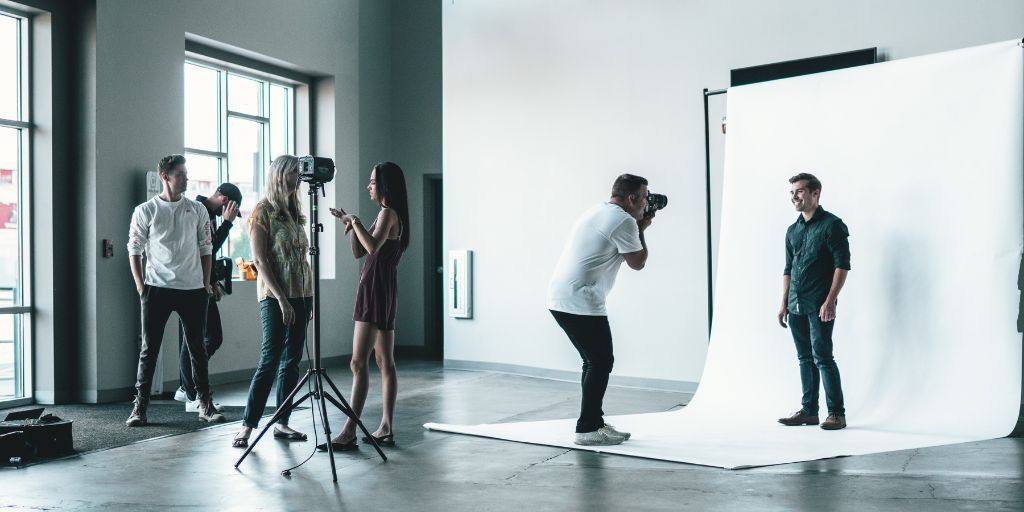
Prepare your model/mannequin
Now it’s time to focus on your model or mannequin. Now whatever option you may choose, you need to know how to set them up to create an efficient product photography workflow. In the case of a model, you have to choose one that aligns with your product type.
If you are capturing athletic clothes, a real athlete model would be a great choice for the shoot.
Next comes the makeup, which you’d have to make sure is done, again, according to the product. If the product is to be worn to a party setting, make sure the makeup reflects that theme. Also, ensure that it doesn’t catch too much attention, as the goal is still to focus on the product, not on the model.
Instruct them about the pose and the expressions that you would like to capture. Make sure to make them feel comfortable with the camera and communicate what you expect out of the shoot.
Test shoot before getting started
This one is a really important step in creating an efficient product photography workflow. This is done as a final check of the equipment, the setup, and the model. Before you get started, this also helps you get aware of everything that you have to take care of.
This may include your camera angle, lighting, background, model position, and all the settings you need to create an efficient product photography workflow.
Capture your shot
Now that everything is prepared, the most important thing is to stick with your planning and trust the process. Sure, you are open to making some creative decisions as a photographer, but here, you have to align them with the brand’s goal.
Also, to create an efficient product photography workflow for eCommerce, you’ll have to follow a discipline of shots.
First, capture the product along with the product-info tag you created at the start. This will help you to learn more about the product later and group various images.
Now, you can carry on with your product photography as per your plan. If it’s a mannequin, prepare it for the shoot and capture it from all the various angles that were decided. Similarly, if it’s model photography, ask your model to strike various poses as planned.
Make sure that all the images of one product are captured consecutively. This will make grouping them together much easier.
You can even use image capture software like Adobe Lightroom or Capture One Pro. These are software that’ll help you catalog and choose your images on the go. They will allow you to review your images instantly and help you create a much more efficient product photography workflow.
Organize Your Images

Now that you have started capturing your products (and this is a continuous and long process) you have to make sure that all your images are organized. If you have followed all the steps above, you must have one product image with an info tag and other product images following it.
You’ll have to make sure all the images were captured perfectly while shooting the image and finalize them at that moment to avoid a reshoot of the same product. It’s time to finalize the images, group them in a folder, and send them for post-production.
Also, make sure to create backups of your files to truly create an efficient product photography workflow. I recommend you create one copy in hardware and another copy in cloud storage. This will help you gain the ease and security of both worlds.
Process your images
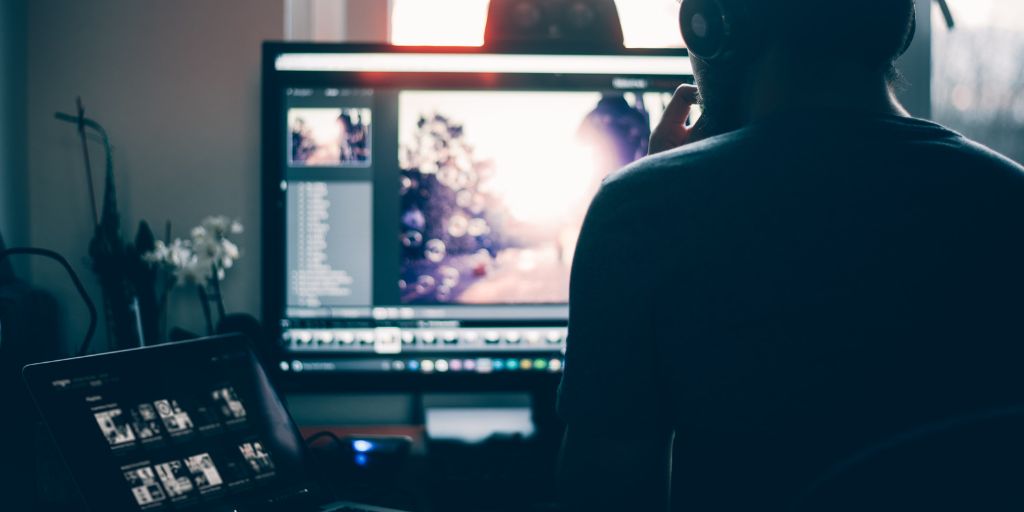
Now that your images are ready for post-production there are two options in front of you. Either you can edit the images in-house, which means you’ll be spending more time and resources on editing rather than focusing on capturing more products and growing your business.
The other option is to outsource your product photo editing. This will reduce your cost and turnaround time, allow you to focus on more important things, and let professional experts handle your editing work.
PixelPhant is a professional eCommerce photo editing service. Its team of highly trained experts ensures that all your images are well-edited and that they are delivered by your set deadline.
Review and publish
This is the final stage and all that is left is your final approval. Once all your eCommerce images are edited you have to make sure they are approved and ready. By now, you have created an efficient product photography workflow for eCommerce.
That means you have a system that you can rely on to reduce the losses and have a productive photo workflow. Efficient product photography workflow for eCommerce also means ensuring that everything is kept track of. That is why you created the Spreadsheet in the beginning. Stick to it and keep it updated. This will help you create a much more efficient product photography workflow.